Post-Op Recovery and a Happy Surprise

You may have (correctly) concluded that I am bananas based on my last post, so I thought I’d share a bit more about my sweater’s surgical intervention. Here is my sweater back, with the right honeycomb panel reknit. It’s really not as scary as it looks to do this.

I put the rest of the (not-jacked-up) knitting on waste yarn holders first, so I wouldn’t have any other knitting needles in my way during surgery. Then I used a pair of short DPNs (5” glove needles, if you’re playing along at home) and a cable needle to reknit the frogged panel. Starting from the bottom, I carefully selected each frogged strand, one row at a time, working them all from the RS. Fun fact: Although counterintuitive, it turned out that reknitting with a size larger than my desired size for the rest of the piece worked much better for keeping the reknit stitches even during surgery. Who knew? Keep that idea in your pocket in case (Knitting Gods Forbid) this ever happens to you. Once I reworked all the rows properly, I put the reknit panel on waste yarn as well before moving on to the other side.

Drunk with power Emboldened by success, I gutted the opposing side. Note: I only frogged back to the first cable cross row, rather than all the way down through the cast on. Because I don’t hate myself that much.

Once the patient was resting comfortably post-op, I turned my attention to facing my real fear.

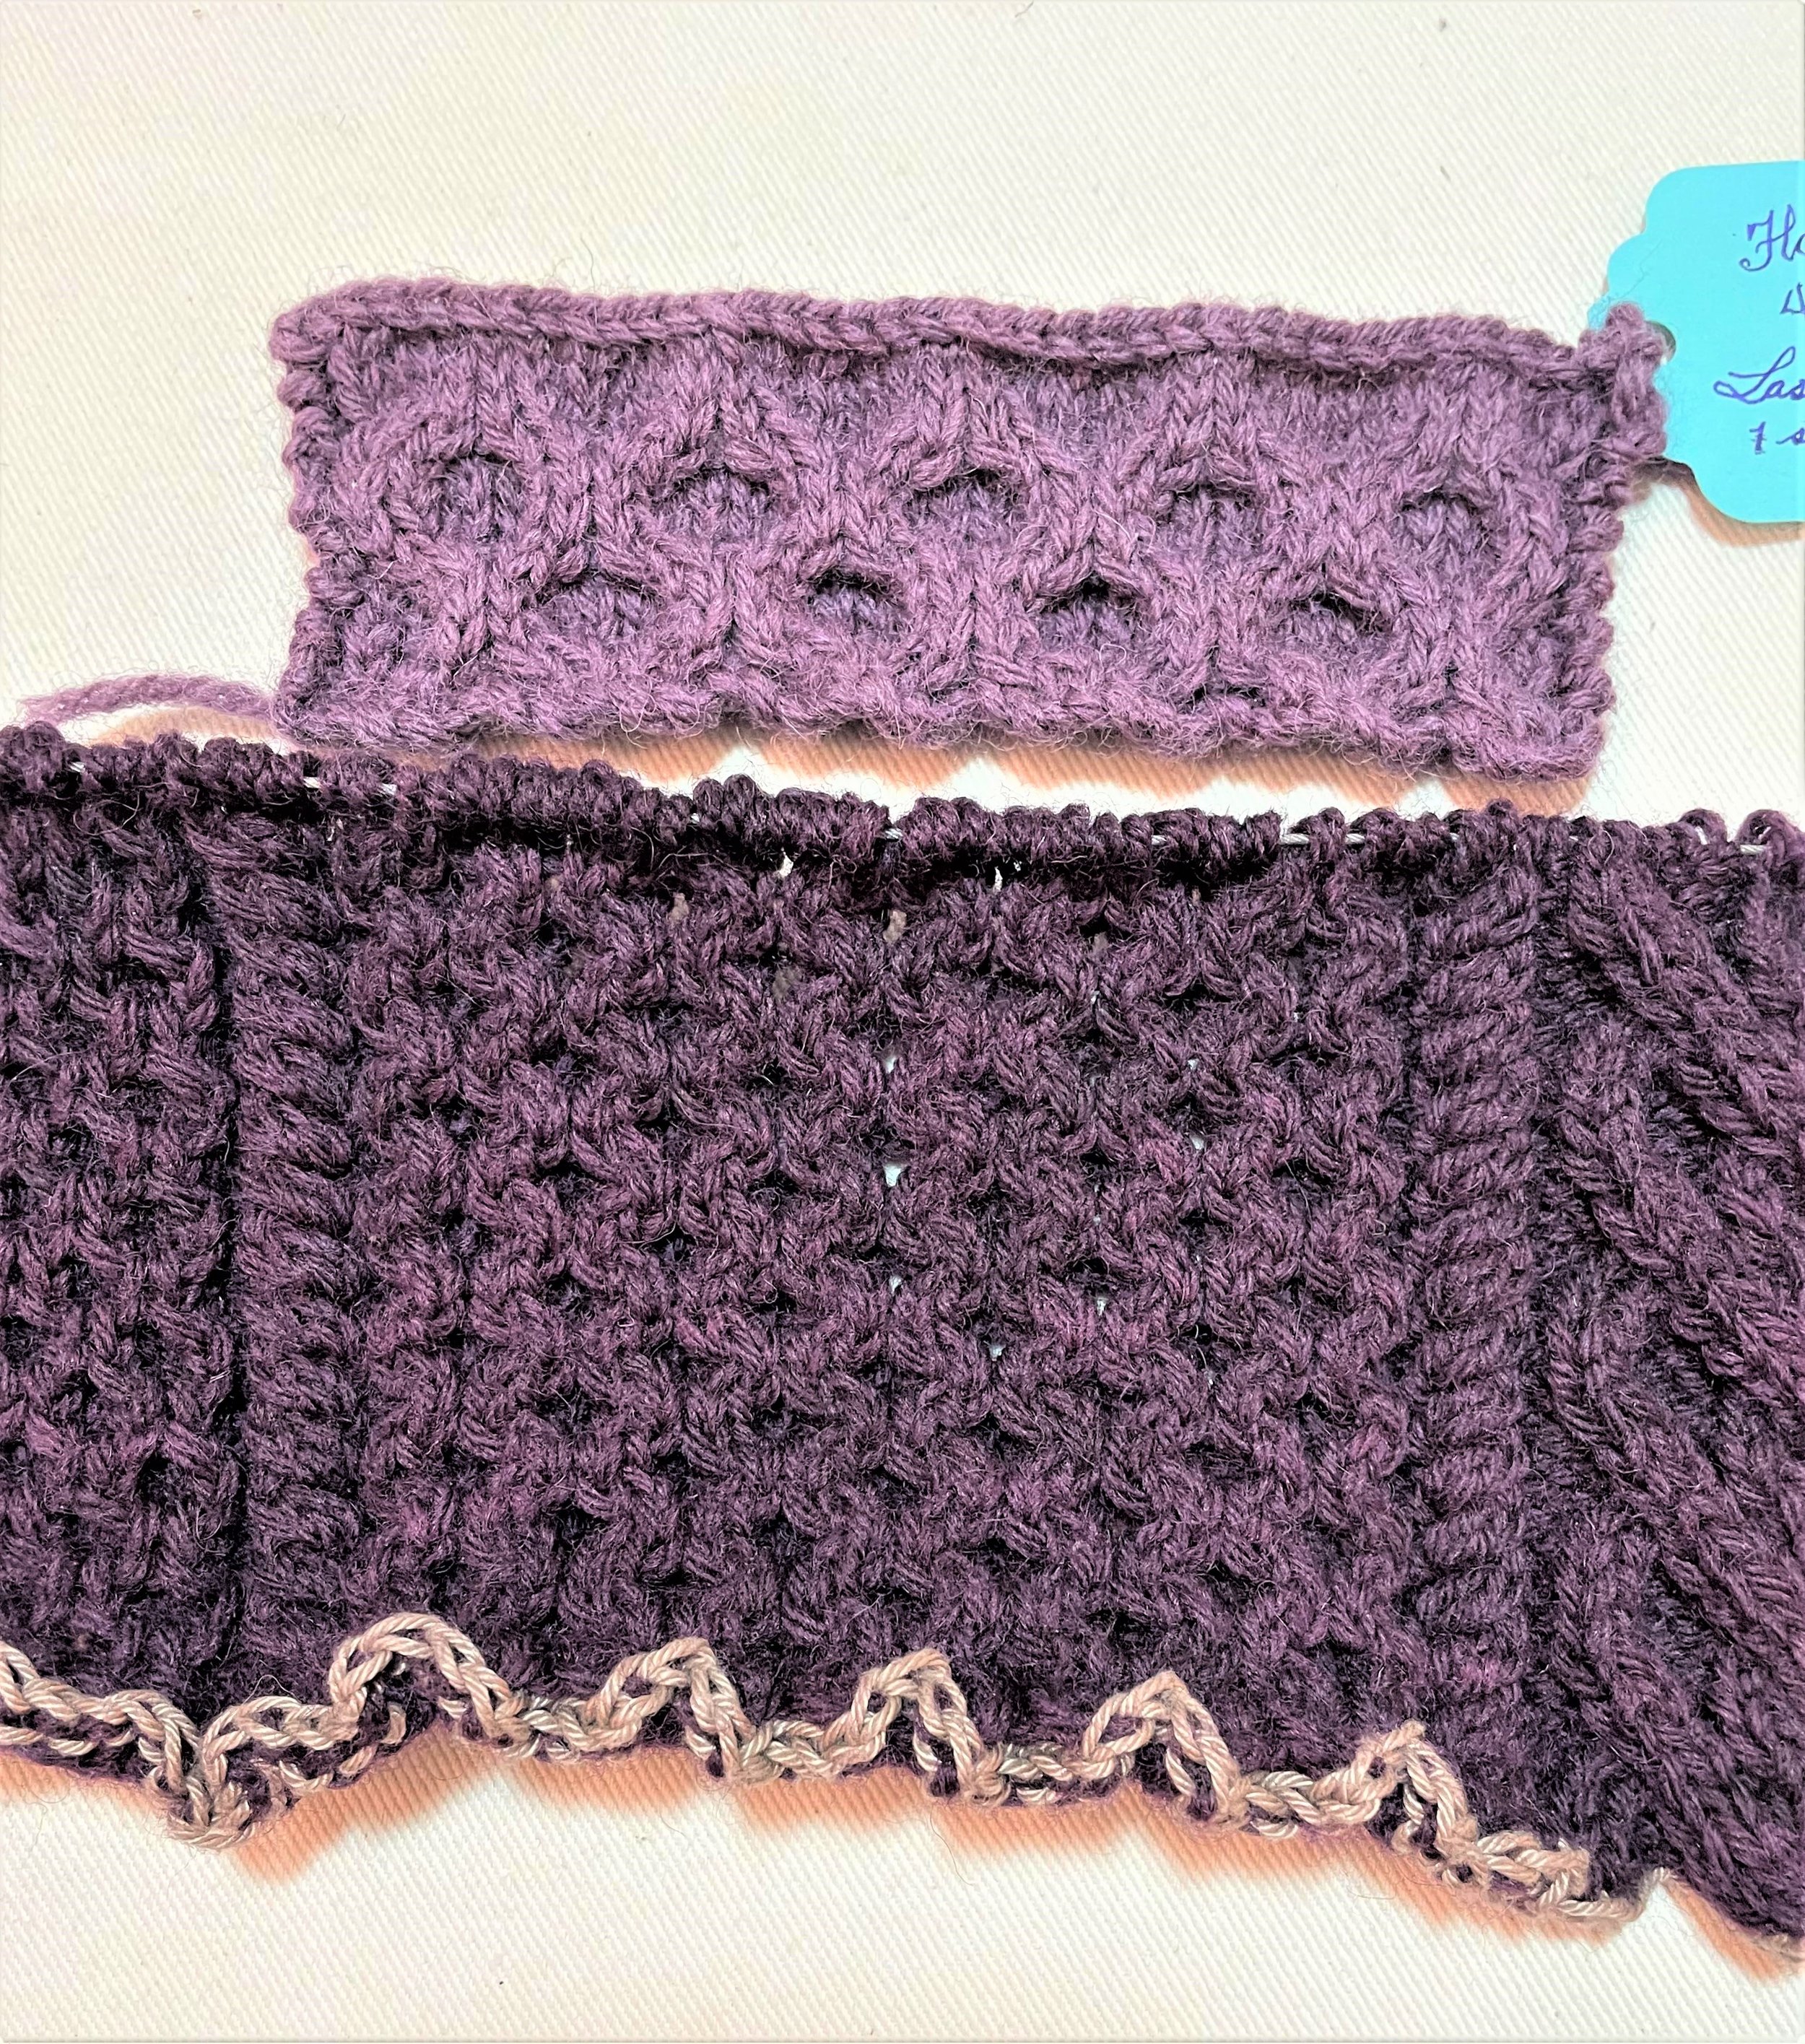
That, dear friends, is my terror of mismatched dye lots. Because I had to dye my yarn on the stovetop it ended up that there were four different batches, using my biggest cauldron. My general level of dye lot anxiety went to eleven over this. I was as meticulous as I know how to be with regard to water, yarn amounts, time and temperature. I took copious notes, and I even used math. But I’m well aware that as a dyer, I make an excellent knitter. I’m a rank amateur as a dyer, and happy to keep it that way.

Even though it looked to be all the same color when it dried, I was still afraid there would be lines of demarcation in the work from skein to skein. And yes, I know I can alternate skeins, but I stupidly fearlessly threw caution to the winds when I began by choosing to use only one skein. Failure to match at this point would mean a total re-start. And probably permanent psychic damage.

The Knitting Gods threw me a bone! In the brightest light available, I wound up the next skein and bravely spit spliced it in. I’m profoundly delighted to report that the new skein is a dead match to the first one. All hail the repeatable dye process! And getting lucky.

All (“All”) that remains is to carry on working up the remaining 3,520 yards. And to not run out of yarn. And to get a sweater that fits. And to live long enough to find out. Anybody placing bets?

When Cables Go Pear-shaped

Having made my list and checked it twice, so to speak, I could hardly wait to jump into knitting Campbell’s Aran. Planning and noodling have their charms, but they’re not knitting, ya know? Due diligence done, there’s a point after which one can’t predict every possible happenstance. I’m always happy, then, when it’s finally time to settle down and play with string in a meaningful way.

Above is the view from my lap, a few inches away from my provisional cast on. There is more to be said on the what and why of that choice, but for now we’ll just call it a deplorable excess of Start-itis. I wanted to crack straight on with the sweater back, and lower edge treatment be damned.

Somewhere about halfway through the first 32-row repeat, I experienced a sinking feeling. The honeycomb panels adjacent to the center felt stiffer than was strictly necessary. And I wasn’t loving how fiddly the stitch pattern was, calling for all those 2-over-2 crosses on every right side row. Spreading out the sweater back to re-measure and “admire” my work, I admitted to myself that I really didn’t like those honeycomb panels at all. In addition to the other issues, they were too close to the same scale as the filler mini-honeycombs at the sides.

How, after all of that swatching to audition cables for knitability and scale, did I make such a glaring error? I unearthed the honeycomb swatch to look at it again, compared with what was happening in my lap:

Can you guess, Gentle Readers, what happened? How about now?

That’s right. After swatching the honeycomb not once, but twice, and finding it worthy, I failed to knit the pattern I had chosen. Instead of working the cable crosses every fourth row, as God intended, I was working them every other row. No wonder it was fiddly, and dense, and small!

Come to think of it, I’ve known PEOPLE who were fiddly, dense and small because they were crossed too often, and I didn’t much like them either.

In my fit of Start-itis, I had been so focused on following the charts I combined to get my pretty center cable that I never even bothered to look at my honeycomb swatch. Which could only mean one thing, of course:

Surgical Intervention. I still don’t know if it would have been faster to operate on it like this or to frog it and start over. I told myself that the surgical route would only require re-knitting 2,560 stitches, while a total do-over would call for 6,400. But of course, any decision that causes me to resort to math is probably already a bad one.

Heed, Gentle Readers, the lesson of our forbears: Those who do not study their swatches are destined to repeat them.

Auditions and callbacks

I’ve been doing a fair bit of mental noodling about Campbell’s Aran sweater, now that the yarn is ready. As always, there are some considerations that will inform my design choices. Conferring with my client, we arrived at the following for the basic silhouette:

Garment Silhouette

As you can see, it’s pretty traditional, with Campbell’s favorite elements included to personalize it. Specifically, he requested shoulder saddles and a shawl collar. It wasn’t till I sat down to sketch it that I realized: I don’t think I’ve ever seen shoulder saddles and a shawl collar on the same sweater. There’s no reason not to do it - I just think it’s a bit uncommon. So is Campbell, though, so there you have it.

Design Elements

Of course, if there are shoulder saddles, I insist that they continue all the way down the sleeves and into the cuffs. Because if it’s not sexy, why bother? Also sexy is when the body cables extend down into the lower edge treatment, through careful planning. Add that one to my list of requirements. There may or may not be a closure of some sort where the collar overlaps. We shall see, but you know me: If there’s a place to put a button, buckle or tie, I’ll find it.

Cable Styles

Cam also had some opinions about the styles of cables he likes: Honeycombs and twists more than geometrics and braids. And finally, we agreed that I could add some special motifs that would be secret messages to him from his mom, but that they would be somewhat hidden, in panels at the sides. More to come on the secret message motifs!

Construction (knitter’s safety)

Before losing my heart to any particular cable(s), I wanted to sort out some construction details. I *MAY* have mentioned that this will be a big sweater. And by “big” I mean “as seen from space”. The amount of fabric in it will require some structural support. For that, I’ll be relying on seams.

At first the idea of seams made me sad, as I prefer to work circularly whenever I can. But on reflection, I realized that swinging a 56-inch sweater around in circles is actually much more work, physically, than working the pieces one at a time. Aside from eliminating seam-sewing, the main advantage to knitting in the round is that you don’t have to work wrong-side (purl) rows. But while that’s true for stockinette knitting, cable knitting has just as many purl stitches on the front as the back side of the work. Knitting separate pieces will also work well for bottom-up construction. I’m choosing that this time so I won’t have to reverse-chart any cables, which can be an adventure/aneurysm.

Another thing I’m thinking about is the cable(s) I’ll choose for those shoulder straps. Yes, they’re dreamy, but they also have to support the weight of the entire sweater. I’m leaning toward something dense, without too many rows between crosses. Otherwise they might stretch laterally, allowing the whole garment to drag out of shape.

In addition the construction, I’m considering scale. I started shopping for cables in my stitch dictionaries with an eye to the sizes, as well as the styles. I’ve got a lot of blank space to fill, without using too many different cables, and without having to repeat elements too frequently. While I will use varied widths, I want the effect to be proportionate to the garment as a whole.

Swatching

With all those ideas in place, I shopped just about every book about cables that I own. Once I found the contenders, I swatched. A. LOT. The paper tags in the photos below are to remind me where I found each chart, and of its stitch count, row count and measurements. Swatching each element and laying them out in order is the best way for me to predict how they will fit and measure together in the actual sweater. I’m sure there are knitters who can accomplish this using math, but I’m not one of them.

This one’s a clear winner for the center front panel. It needs borders on either side to keep it company though.

I remembered this little number from a different book. Its row count is perfect, and there’s a lovely reverse of it for the other side (didn’t bother swatching the reverse). And then I added a wee 4-st twist to border the works and divide it from the next panel:

Which will be Cam’s requested Honeycomb. It took a few tries to get a width I like but I love it juxtaposed with the rope-y center twist. Bonus: it’s un-thinky to knit, and the row count also works well with its neighbors.

And now for the important stabilizing shoulder saddles. I like this firm plait for the job. I can also easily widen it if need be.

Here’s a combo I made up to border the shoulder saddle. I don’t love it yet and still need to try again. Adjacent to that is the filler stitch I’ll be using throughout: Mini Honeycomb. It’s fun to knit (no cable needle required!) and the fabric is both fluffy and flexible. I’m a fan.

This is the swatch collection (only those making the first cut - there are MANY others I deemed not groovy) so far. On the left are some contenders for the “secret message” side panels…To be continued.

So that’s the state of Campbell’s Aran at the moment. How do you like to plan your cables, Gentle Readers? Please share your process in the comments!