Greetings from the Other Side

Alert Reader Amy from Seattle cleverly asked of the Chinese Garden wrap "What does it look like on the other side?", prompting me to spend a little time reflecting on the notion of "Right" vs. "Wrong" sides of things. Of course, we can always diplomatically change our vernacular to "Public" and "Non-Public" when we refer to insides and outsides. But as knitters, we're always referring to the planes of our work. Have you ever wondered how to make colorwork that's presentable to the world from both sides? It's easy. I do it all the time, and so can you.

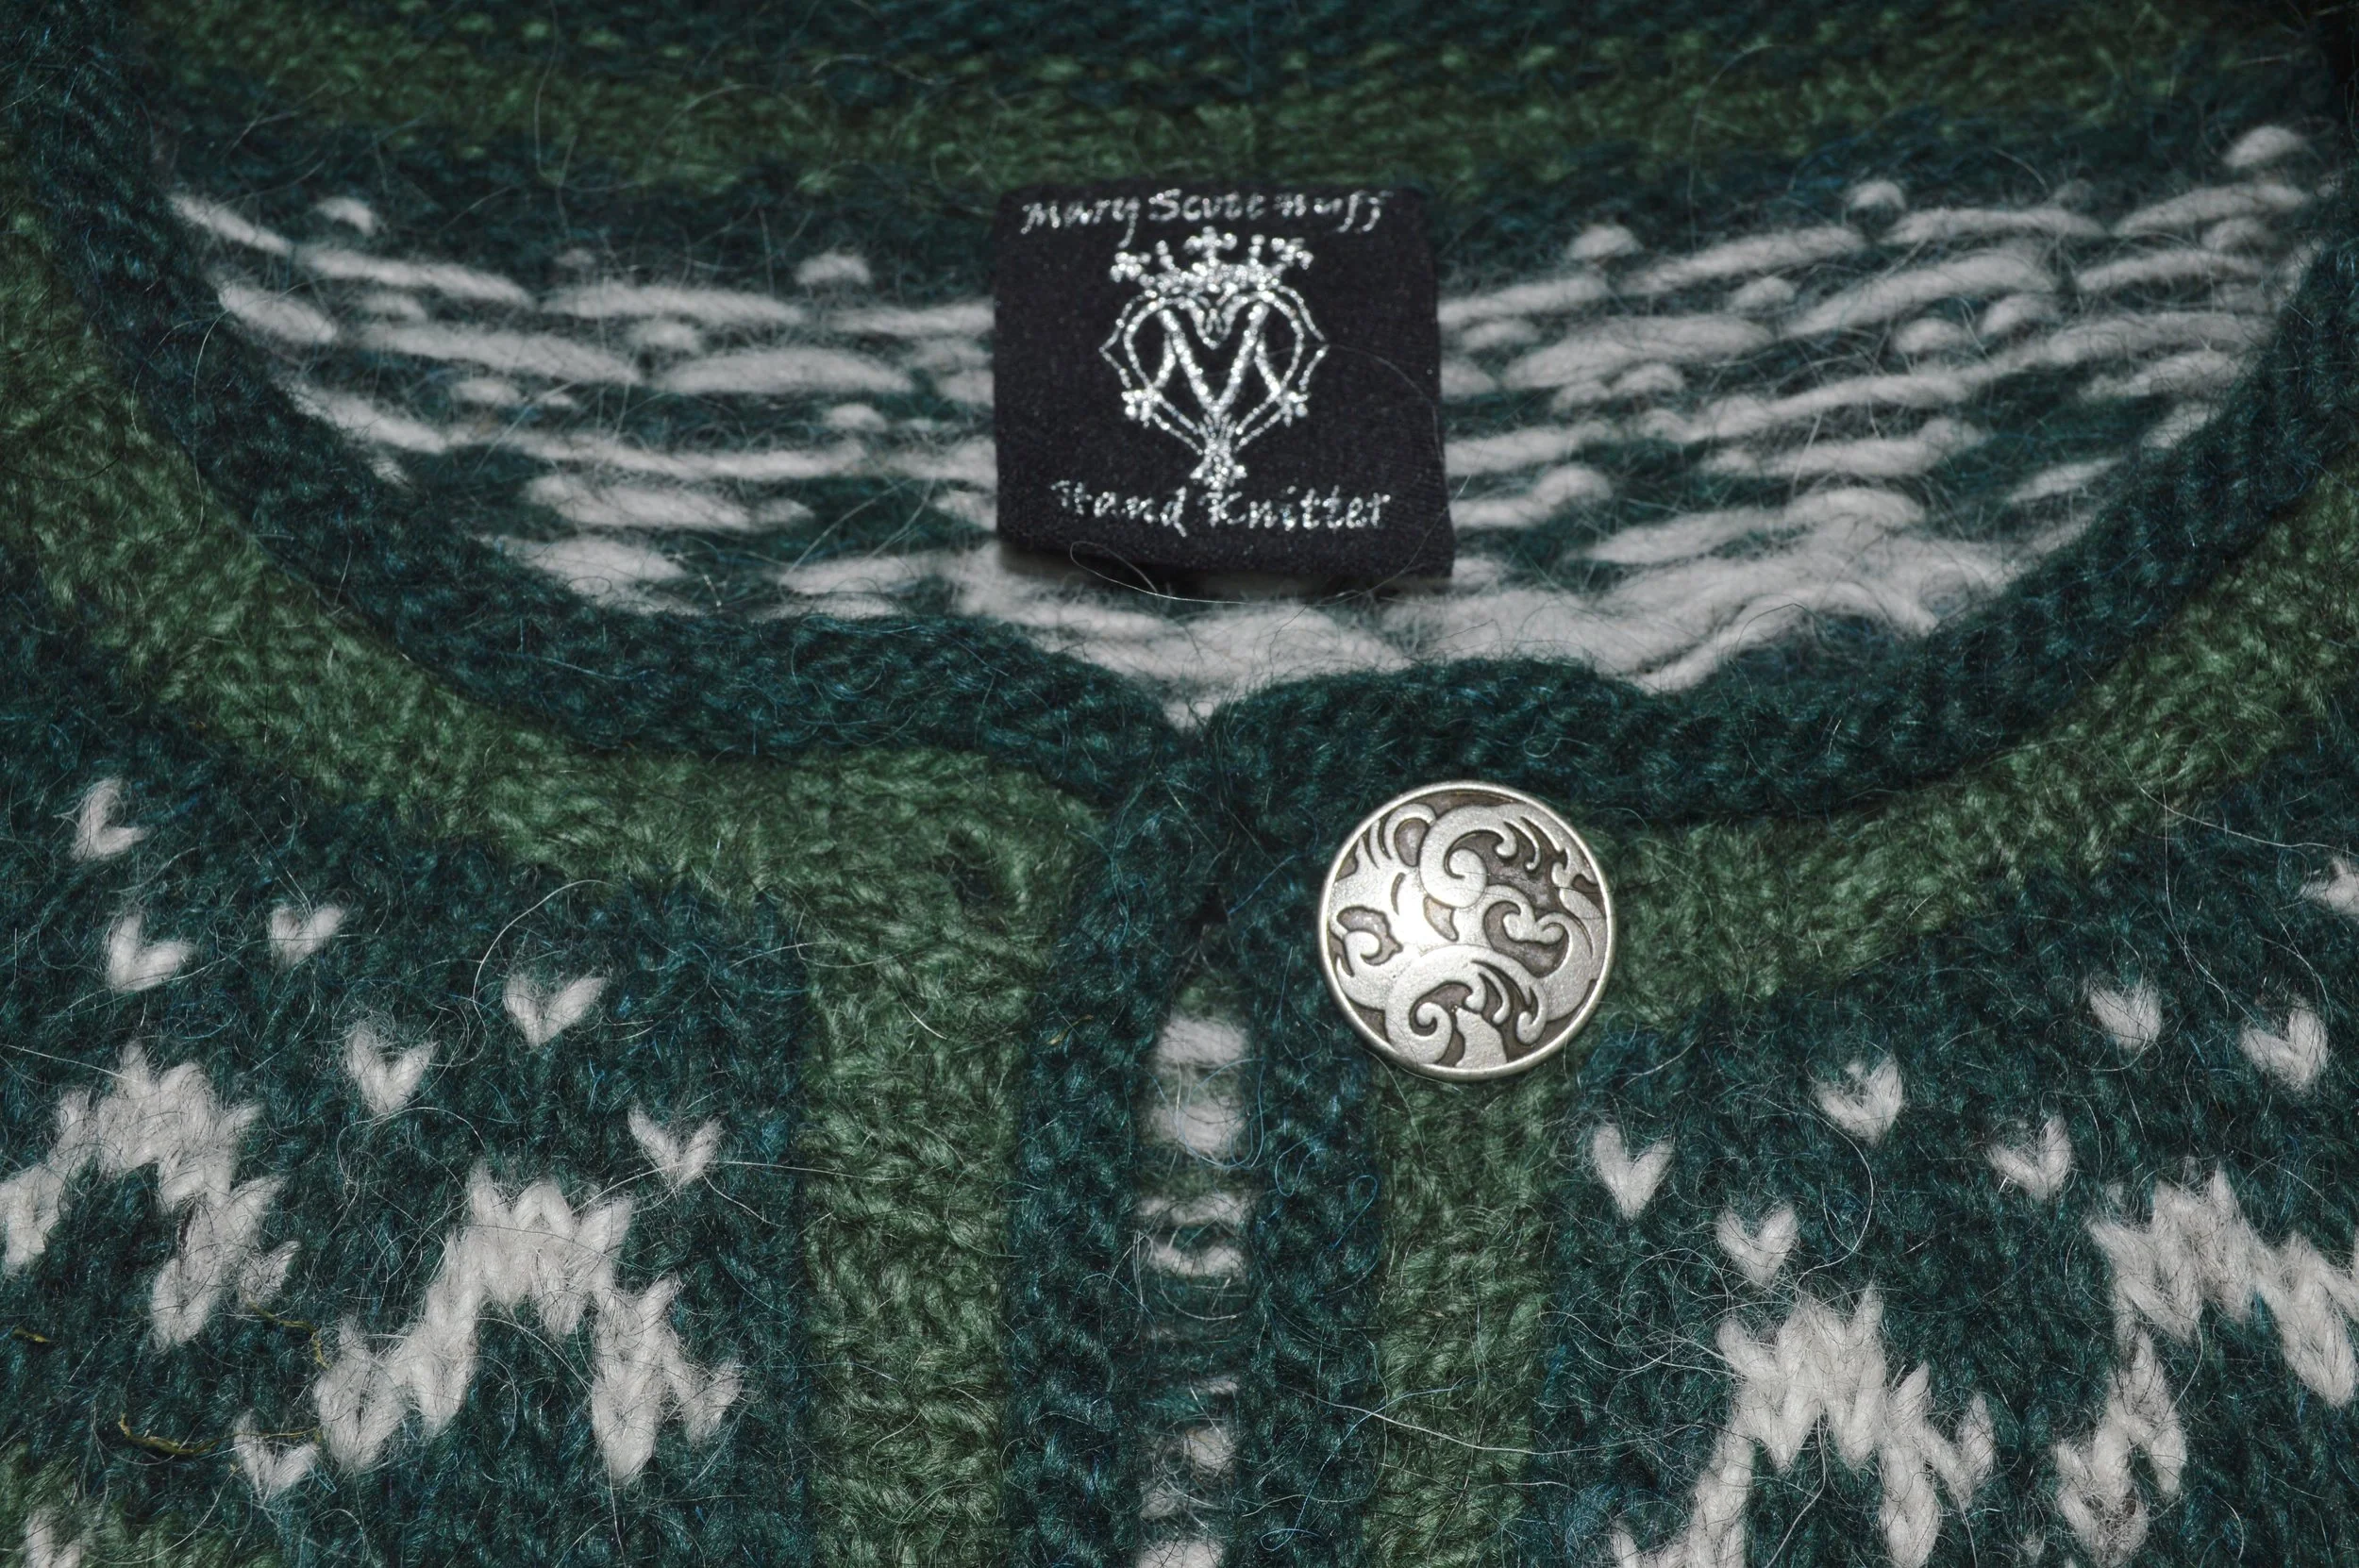
Today I would like to challenge you, Gentle Readers, to think about the insides of things. I often hear that part of the fun of seeing my trunk shows is getting a good look at what's going on behind the scenes of the pieces. For those who haven't seen yet, here are a few:

Chinese Garden Outside

Stars and Stripes Outside

Regnbue Outside

Butterflies Outside

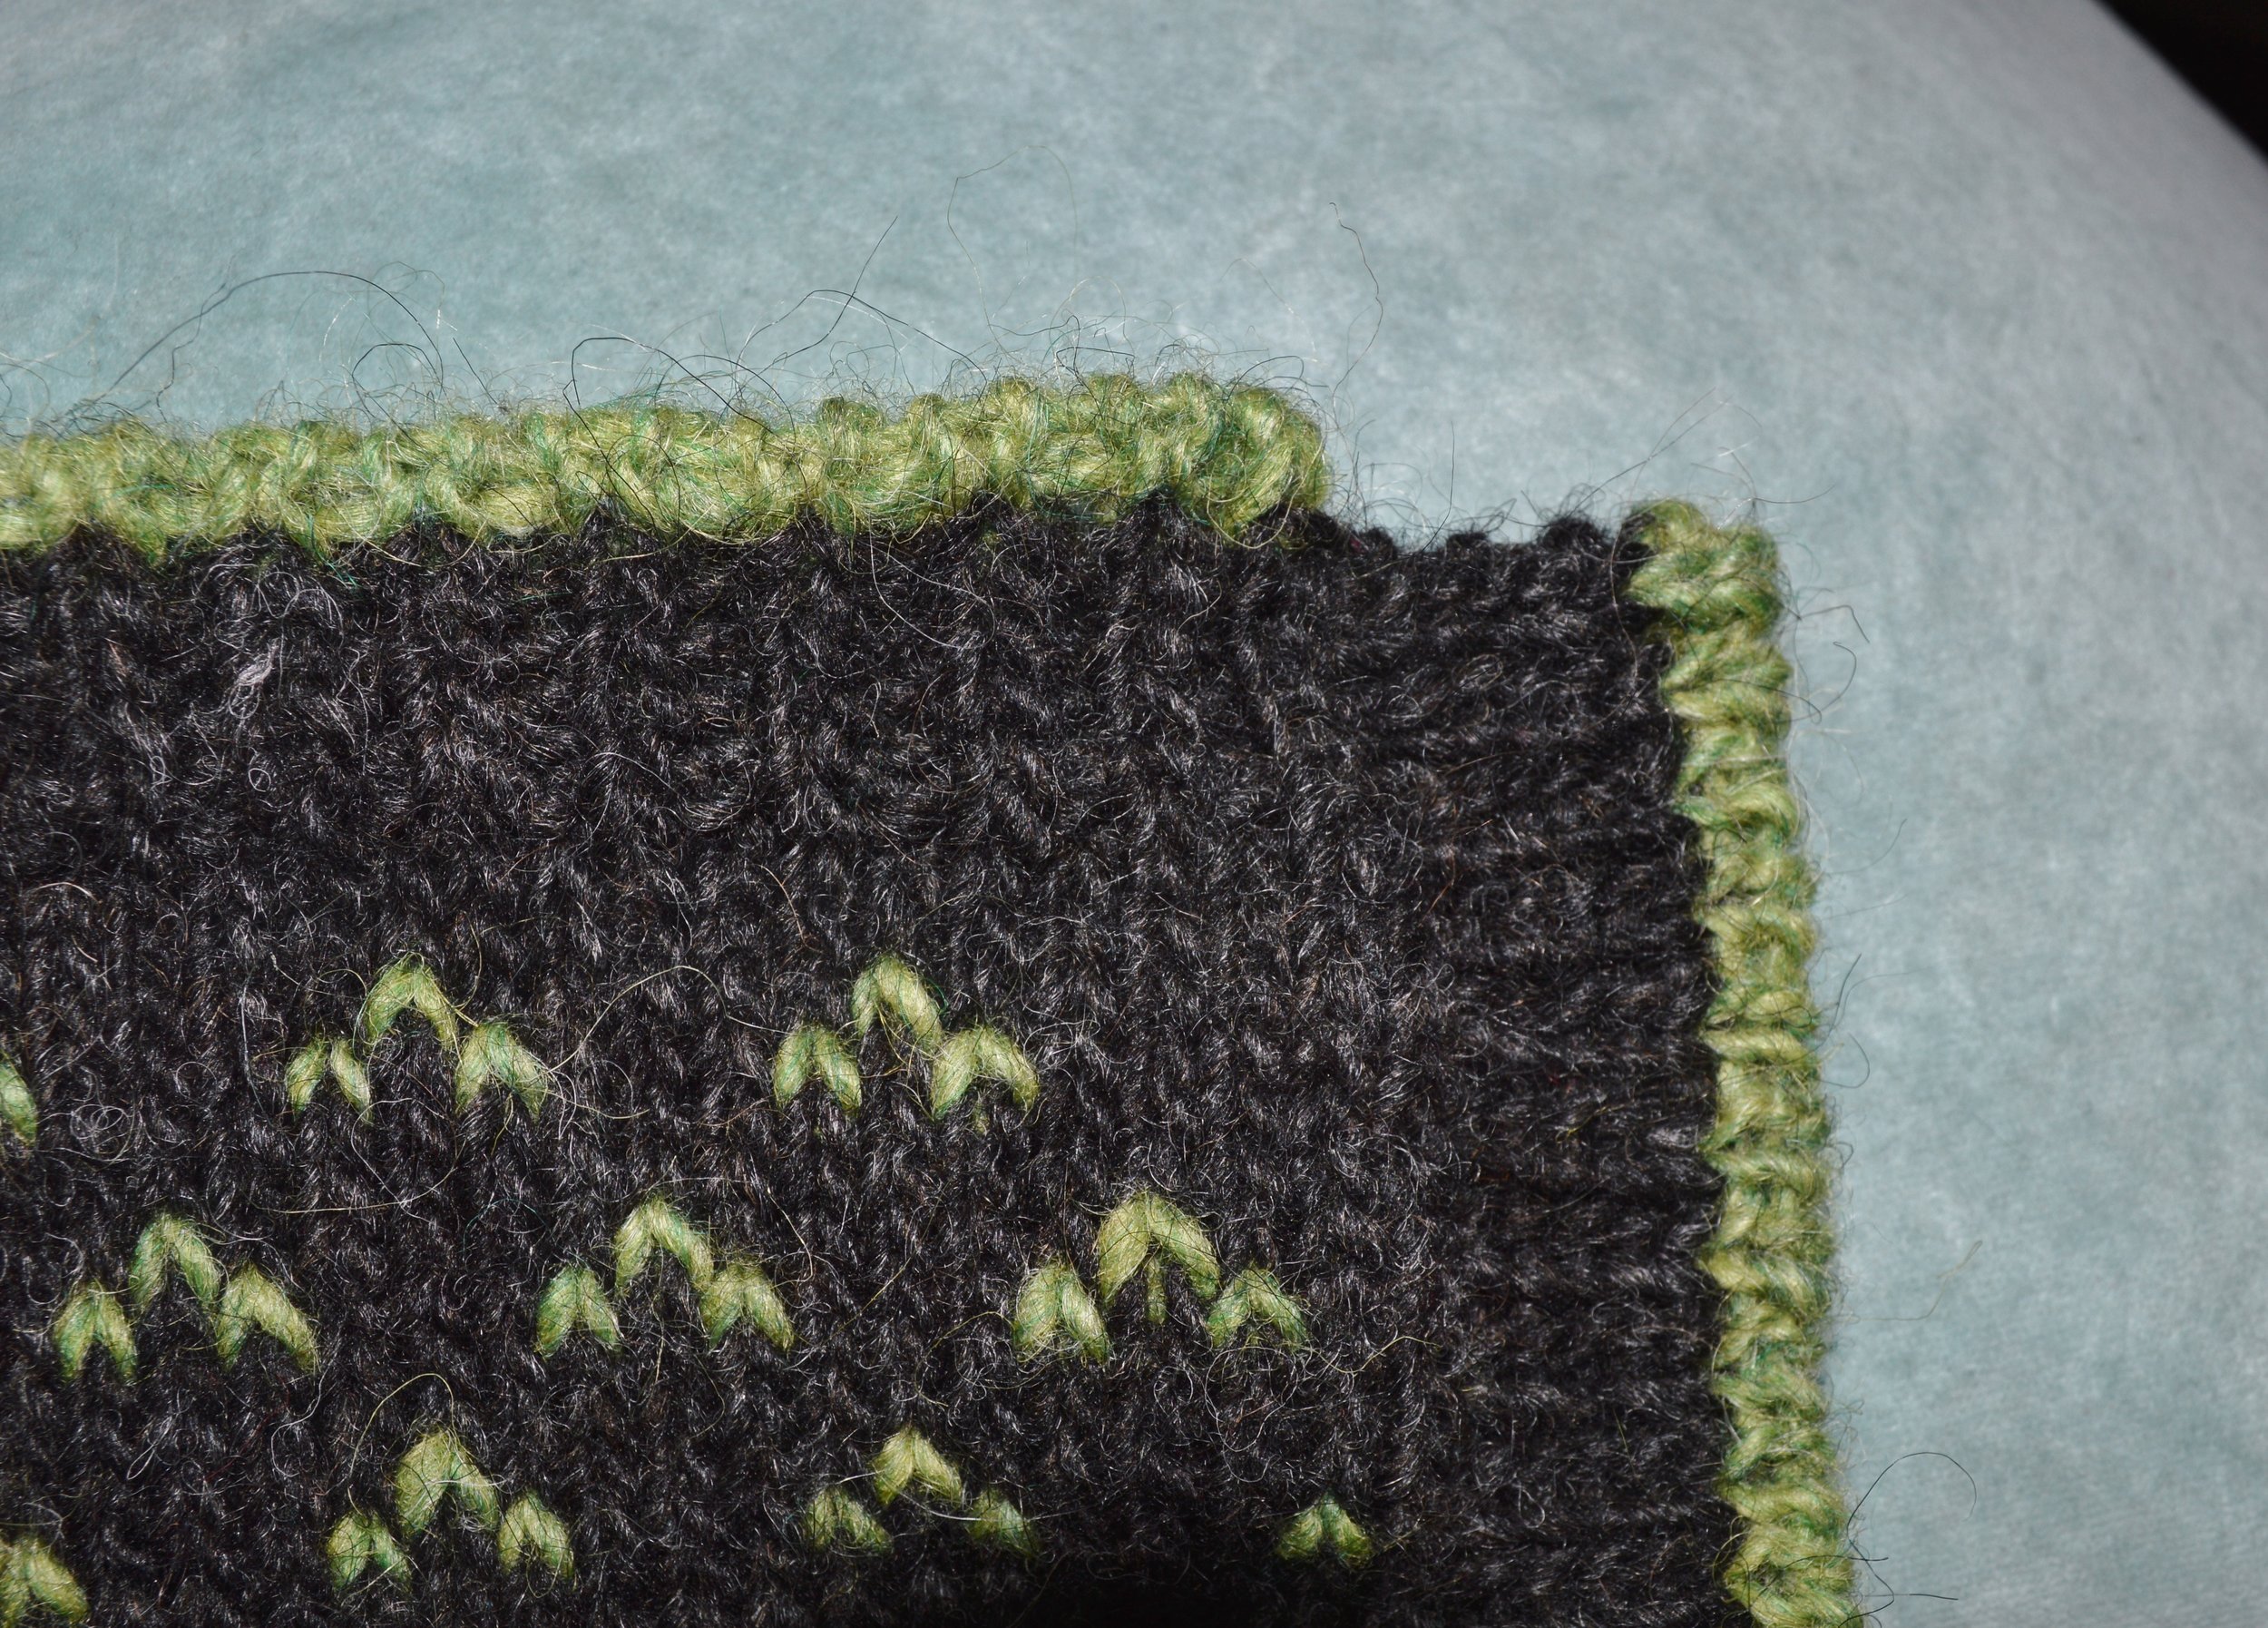
Chinese Garden Inside

Stars and Stripes Inside

Regnbue Inside

Butterflies Inside

One of the many charms of Stranded Colorwork knitting is that its insides can be just as lovely (more?) as its outsides! How can we achieve this? Those who have been to  my introduction to Stranded Colorwork class, 2 Strings=Not Scary already know: We can easily keep our floats beautiful and our tension perfect by applying two concepts (okay, they're really just Sexy Party Tricks, but who cares?).

Thing One: Strand Orientation. Don't twist the unused strands around one another. Ever. This is especially easy if you are knitting from one of my patterns because I design the motifs in such a way that you will never have to tack (twist) a float. Period. So just don't do it. Ta-Da! Instantly beautiful insides.

Thing Two: Float Tension. Mechanically introduce extra slack into the unused strand as you knit by stretching the stitches you are carrying across the back of. This extra float length will magically disappear during blocking, wearing, etc [insert Interpretive Dance here]. Yes, if you work on Stranded Colorwork with me, I will explain float tension via an interpretive dance; just one more service I provide.

That's it. There are only two things to know in order to make the back of your knitting as beautiful and interesting as the front. Mischief Managed. Come see me in class to get the full explaination/show on this. CLICK HERE for my upcoming session, or if you aren't in that neighborhood, contact me to schedule a class with your guild, event, or group of knitting pals!

Oh Knitting! You are so beautiful and full of surprises. Aren't we lucky to know the secrets?

Next Time: Who's up for a Knitalong? I've been asked for help with a pattern, and you know how hard it ISN'T to trick me into knitting something with you...

Here's A Tip

In the fashion industry, ribbing with a contrasting color at its edge is referred to as "tipped". I like to incorporate tipped edges into my designs as a way of outlining or underscoring each piece. And because I think single-color ribbed edges are boring. Here's the tipped edge I made for my "Waves" cardi:

It's actually a rolled bit of stockinette stitch, adjacent to the 2 x 2 ribbing.

And here is the (nearly - still needs buttons) complete Fugl, with spring green tipped edges. I love the way it looks, and it's really fun to knit, with one tiny issue: Knitting doesn't work that way. In my hands, at least, knitting works like this:

First I knit the neckline ribbing, with a swell green bind off edge. Then I work a placket, at 90 degrees to that, with its own green bind off. Which leaves a gap with NO green bind off, at the top and the bottom of the button placket. This bugs me. And here "bugs" may mean night terrors, brain fissures, and/or feelings of inadequacy.

Steps must be taken.

See? It's like wearing shoes on the wrong feet: possible, but intolerable.

See? It's like wearing shoes on the wrong feet: possible, but intolerable.

Unable to leave such affronts unchallenged, I handle it like this:

First, with the tipping color, I pick up and knit through the "naked" edge, the number of stitches I think look pretty. In this case, it was seven.

Then I execute whichever honorable and impressive bind-off maneuver I used for the rest of the edges. After that, I use the yarn tails to darn the "filler" edging to the previously-worked ones, if necessary, and Voila! Self-satisfied smugness is achieved. Fiddly? a bit. But preferable to brain fissures.

If you elect to try out your own tipped edges, remember to work the first row of your color change in all KNIT stitches. That way you'll avoid forming yucky bi-color purl bumps. For example, the sewn tubular bind off above is a two-row gig, so first I work a row of all knits in the new color, then proceed with my two-row bind off pattern. Capiche?

Try a tipped edge (either cast on or bind off) next time you need to make a swatch. Look how smart you are!

Unventing Martin Storey's Roan

In Rowan 56, designer Martin Storey presents the beautful "Roan", with as lovely a charted colorwork pattern as ever I have seen:

Photo by Peter Christian Christiansen

So lovely is Roan that knitters everywhere immediately embraced it, including our own Ginny G.  But a quick perusal of the projects on Ravelry reveals the caveats of other knitters:  

1.  It's knit back and forth in rows, rather than circularly

2.  It's *oddly* shaped.  The schematic looks something like this:

Challenge 1:  Knitting Flat.  I have no idea why our knitting friends in England insist on working traditional stranded colorwork back and forth, in rows.  This piece is even referred to as "Fair Isle" by the designer, though I doubt if any traditional knitters on Fair or anywhere in Shetland would claim this as their own.  And that's not because the style is modern, though it is.  It's because knitting this in 5 flat pieces and then seaming them together would be absolutely miserable. True Fair Isle knitting is worked circularly, by definition.

Challenge 2:  Shaping.  I suspect that Roan's silhouette is influenced by the Japanese Kimono, with its square drop-shoulder sleeves and continuous neck opening.  But there's just one little problem:  The shape of this piece doesn't allow us anywhere to put our necks.  I've read the directions and checked them twice, and the pattern clearly states that the two front rectangles should meet at the center of the back.  Which means there's no notch for the wearer's neck. The fronts, correspondingly, have to hike up at the center,  (see photo above: "hold the bucket up higher, honey!") Anatomically speaking, this shape can't properly fit a body.

This is the shape I would make, if I were to knit Roan. The chart and stitch counts will still work perfectly, with just a couple of small changes. I've imagined a few things that would make it friendlier to wear, and much more fun to knit:

The first issue I would address is the lack of back neckline.  The design would still look as it was intended, but fit better, with the simple execution of some decreases, adjacent to the top of the front opening. I'd calculate the math something like this:

I'd also taper the sleeves slightly at the cuff, just because I find true Kimono sleeves to be uncomfortably sloppy.  To do that, I'd draw a diagonal line on the chart from the cuff to the sleeve top, lopping off about 20% of the total sleeve sts at the cuff edges, like this:

Then I would knit two tubes.  That's it.  They would look like this:

The purple lines indicate where the vertical cuts happen, and the wee hearts represent evenly-spaced increases and decreases.  See how those neckline decreases cause my body tube to deform a little (get smaller) at the top?  It will lay flat once the center front cut is made.  

Alternatively, I could just knit a perfect cylinder for the body tube and cut out a narrow triangle from the front neckline: no math or decrease spacing required!

Important: Notice I have not indicated any special cutting area for the armholes? That's because I'd want to make the sleeves first, separate them, and sew their underarm seams. Then, and only then, would I cut some slashes into the sides of the body tube that are the exact measurement of the finished sleeve tops.  Never try to knit sleeve tops that fit openings - it's too hard. Cut openings to fit sleeve tops.  It's easy. For a tutorial on conjoined sleeves, CLICK HERE and HERE

Here are where the cut edges end up:

And that's all there is to it.  The stitch counts in the edgings would change, but that's about it. I drew a little slope in my shoulders for these diagrams, But on further reflection, I wouldn't actually add that shaping.  A square drop shoulder is perfectly kimono-like, and much easier to work.

I believe that knitting which is truly beautiful has to be satisfying (both fun and skill-enhancing) to make, AND it has to make us feel beautiful when we wear it.  Without those two elements, we might as well just go shopping.

Whaddya think, Gentle Readers? Would you be more, or less willing to take a whack at Roan with these modifications?