Rain in the Desert

You might remember my telling you a few posts back about meeting the lovely and talented Susan Stambaugh of Abstract Fiber at the TKGA show here in Portland.  It turns out that Susan has been working her handpainted magic right here in my own back yard all along.  She lives in Portland, too, and I drive right past her studio all the time.  Together we hatched a cunning plan, whereby there would be a new pattern that uses her yarn available for you at Sock Summit.  As an esteemed vendor at the big show, Susan will have the yarn and the pattern available for your knitting delight!  Both will be available online, too, so you won't miss out if you can't make it to Portland this year.

Let me tell you about making Desert Rain:  I was thinking about something I might be inclined to knit in August, when it's hot even here in the Pacific Northwest.  I knew I didn't want it to be socks, since this yarn is already supported nicely in that department..  And my rebellious nature prohibits me from making socks for Sock Summit.  Plus, I liked the painting on this yarn so much that I decided it needed some acreage in which to show off - an i-pod cover was not going to be large enough to showcase its gorgeous colors. 

All of these thoughts tore through my mind before I even left Susan's booth at TKGA.  I was carrying (okay, I may have clutched it protectively to my chest) my 2 perfect skeins and daydreaming a million things about what it wanted to be when I bumped (literally - I have the shin bruise to prove it) into the booth next door.  They had buttons, baubles and beads galore.  And they had the singular shade of blue you see above, which naturally came straight home with me.  I have never knitted with beads before this project: What A Hoot!  It is so much fun, and adds just the right texture and sparkle.

Once I had those beads, everything seemed to click into place, and I had the sample done in a week.  Dontcha just love a fast knit?  The lace pattern is fun, the beads are sparkly, and the ribbon adds just the right finish.  And here's the best part: this is some really good yarn.  There are beautiful, temperamental yarns.  There are some yarns that are easy-going and compliant, but not superstar pretty.  SuperSock has the best of both worlds.  Sproingy, snagless, and well-behaved; it also has the perfect pearly sheen to highlight Susan's gorgeous painting.  But that's enough talking - time to get to the Eye Candy:

This is only a little snapshot I grabbed as I flew out the door.  Wait till you see it in the light of day.  It comes in sizes 32"-52", and probably fits more than that, knit with negative ease, as it is.  Lace is so forgiving and so flattering - no wonder we love it so.  Check out the drape and swish on this baby - Sassy, No?

So that's Desert Rain, in progress to publication.  A project that designed itself: no gut-wrenching frogging, no lost skeins, no kitchen fires.  Hardly seems like I worked at all. Oh man, I love my job.
 

By Any Other Name

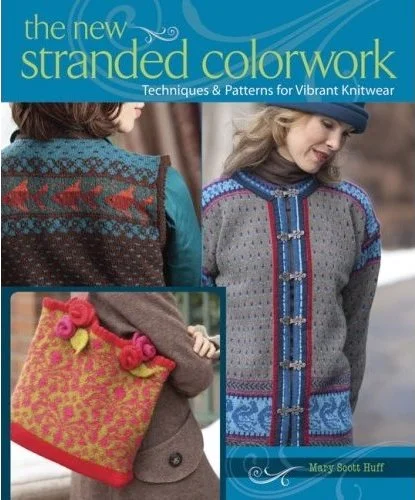
A while back, I promised to reveal the name of my upcoming book, as soon as I was sure it wouldn't be changing (again).  I am pleased to announce that today is that day:

While it won't be in stores until the end of October, it can be pre-ordered here

It is my hope that reading my book will be like a visit into my imagination, for those brave souls willing to stop by.  Inside it are twenty designs that I made up, based on things I saw, thought about, or had feelings for.  There is also a collection of information that I have accumulated through trial, error, learning and teaching.  I have done everything I could think of to make it interesting, accessible, and inspiring.  There is also a bangin' cast on & bind off that I promise you have never seen before and will love.

To all of you who have listened to me rant/brag/snivel/navel-gaze through the process of getting my first book to print, I offer my sincere gratitude.  Without your support, I could never have made it. 

I can't wait to see what the knitters do with it!
 

How To Make A Spinning Wheel Bag

Lately it seems that whenever I want to know how to do something, it's really difficult for me to find information (or safety warnings, as the case may be) from those who have tried it before.  This leads me to believe that Something Ought To Be Done, and so I have begun to make these little tutorials.  On the chance that others may be looking for the same help, I'm offering up what I have learned.  I hope you will contact me with ideas for future tutorials - I'm always eager to learn and share, even if it's from the perspective of what not to do.

Here's where I left off with the BFRBSW:  When last I reported, I was struggling with the color of my repurposed wool, having achieved only Persimmon, when I wanted RED.  I braced myself for the worst, convinced that to get real red I would have to take off the gloves (or put them ON, as it turns out) and get some Real dye - the kind you can't get at the grocery store that has heavy metals and other scary things in it.  And then by the time I calculated shipping costs and waiting times, I had chickened myself out.  I decided to try one more time, this time, using my beloved drink mix.  No less than 12 packets of Tropical Punch later (plus a whole bottle of green food coloring I had laying around, just for giggles), and I got the painted, rustic, RED look I was hoping for:

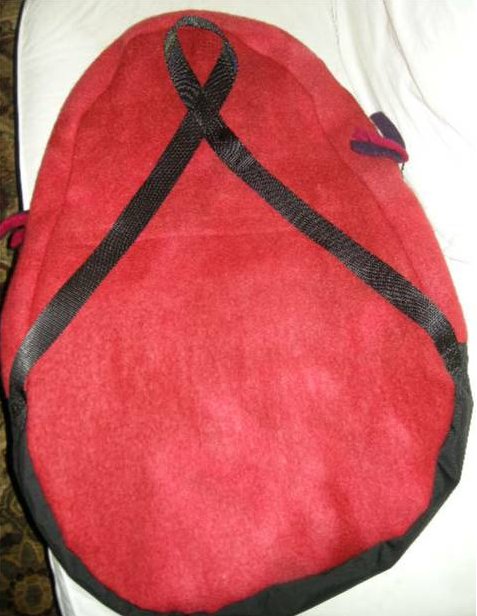
Here's a shot of the back, where you can also see that I attached a couple of 1 1/2" straps, backpack style, with a loop at the top for grabbing hold of.  You can also see that the bottom 1/3 of my side gusset is reinforced with ballistic nylon, for a little extra stability.

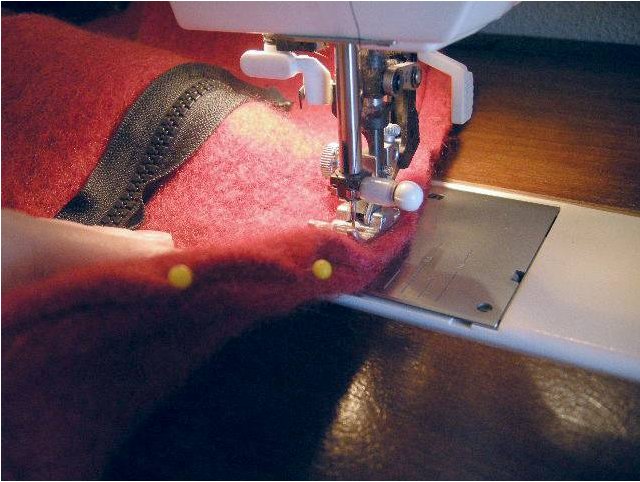
Here you can see how thick and fluffy my felted wool blanket is:

Two layers together are easily 1/2" thick, so do not attempt these maneuvers outside of a closed course with safety personnel standing by.  Go slow with your machine, and for pity's sake, do NOT run over any pins.  You can also see the zipper in this shot, already inserted into the side gusset.

I was so pleased with myself after achieving Kool-Aid success that I decided to use the scraps that had not been dyed yet as surface decoration:

Here they are drying in the sun outside.  I cut them out freehand and threw them randomly into 4 different pots of Dylon (Flamingo Pink, Bahama Blue, Amazon Green, and Intense Violet).

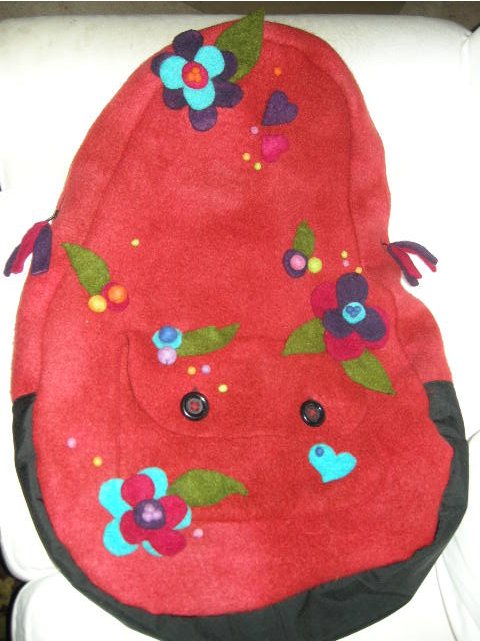
And here's the Big Payoff:

The round felt balls are premade from the craft store (create when you must, cheat when you can), and the tassel-thingys are zipper pulls I made from the embellishment scraps.  I think it has a fun cartoon-y quality, which is about right for what amounts to the world's largest homemade backpack:

Size reference = actual 7-year old

Size reference = actual 7-year old

And that's all it took:  Old blanket + Way the hell too much time + Perseverance = BFRBSW.

Here's an official materials list, for any brave (or broke) souls who wish to attempt their own:

1 Old wool blanket, free of moth holes or stains, felted (about 2.5 yds total fabric needed)
2 yds pre-quilted lining fabric for lining
1 36" 2-way zipper
1.5" buttons (2)
.25 yds ballistic nylon for bottom reinforcement
1 packet felted wool beads

The side gusset and pockets are not drawn in my pattern schematic, but measure as follows:
Side Gusset:    7"H x 66"L rectangle, seamed at center bottom of bag, slit horizontally in center 36" to accommodate zipper.
Pocket:            14"W x 10"H with rounded lower corners
Pocket Flap:     14"W x 4"H with rounded lower corners
Bag Bottom:     7"H x 22"L

Vague Sewing Instructions (this is a knitting blog, after all, and if you are confident enough to attempt sewing this project, you probably don't need much from me anyway.  That said, please e-mail me if I can help at all):

Cut front and back (one each from outer fabric and lining fabric)
Cut side gusset (one each from outer fabric and lining fabric)
Cut one pocket and one pocket flap from outer fabric
Cut one lower reinforcement from nylon fabric

Cut a 36" horizontal slit in side gusset and side gusset lining.  Install zipper in outer fabric side gusset.  Join ends of side gusset.  Baste lower reinforcement to side gusset, centering on gusset seam.  Pin and sew pocket and flap in place on bag front.  Pin and sew side gusset to bag front, centering bottom and zipper.  Pin and sew bag back.  Repeat with lining pieces.  Insert lining into bag and stitch in place by hand, inside, along zipper edge.  Pin strap in place and stitch firmly by hand at ends and center back loop, as shown.  Add embellishments as desired.

My wheel is a Lendrum DT Complete, so if you have the same model, these measurements will work for you as is.  If yours is a different brand of folding wheel, you will need to measure accordingly, but the basic pieces should still work for you.

In addition to the donated wool outer fabric, I spent about $75 on materials (including dyestuffs for 2 attempts, YMMV)  The only commercially-available spinning wheel bag I am aware of sells for $120-$200, depending on the fabric you choose.  Totally worth it, if you have the means, and your time is worth anything (it IS).  If you lack the means, or just want yours to be different from what everyone else has when you show up for spinning class, I recommend making your own!