
Speaking Mandarin (A Standing Collar is Born)
The Frog Prince progresses at a steady clip, probably because knowing that I need to stay ahead of the next blog post has added a whole new dimension of accountablilty to the process. We who would otherwise lag behind, thank you. In case I haven't explained it, my Cunning Plan is to make the Frog Prince available to you before my book tour begins, which is either optomistic or delusional; only time will tell.
In order to make a standing collar curve neatly around a human neck, it has to be made in the shape of an arc, like a rainbow, rather than a plain rectangle. We could accomplish this shaping with decreases, but not without disrupting the stitch count and making the colorwork aspect UN-fun. Instead, we'll cheat, capitalizing on the incredible properties of gauge, and the remarkable ability of wool to be shaped with steam. For once, we are going to use these powers for good. Thus Spoke The Queen.
After joining the shoulder seams with a three-needle bindoff, I pick up some stitches around the neckline, including those previously held on waste yarn across the back. This step is the final disposition of all those live stitches that were held off at the top of the original knitted tube. They are all neatly accounted for now. Tricksy, no?

I place a couple of markers and create a new steek for the collar (we haven't come this far just to start purling, now!). I use a size 3 needle for the first 10 rows of the collar, a size 2 for the next ten, and a size 1 for the last 10. Presto: an arc-shaped mandarin with no stitch count changes.
Then I knit a 30-row facing (the black part) for the collar, reversing the needle size changes every 10 rows, and bind it off. Here I have marked the steek, which will be machine-stitched and cut, just as before. I will spare you photos of that carnage, but do note that this step marks the last of all the steeking and cutting in the Frog Prince. The Crowd Goes Wild.

After cutting the collar steek, I steam-block the collar to make the facing quit rolling. Then I pin and stitch it over the cut neckline curve edges. That is the main reason to face the collar: I want those cut edges covered. I could alternatively do this with bias tape, but I like the extra body provided by the full facing. A standing collar must, after all, stand, and two layers of fabric are better than one for that.
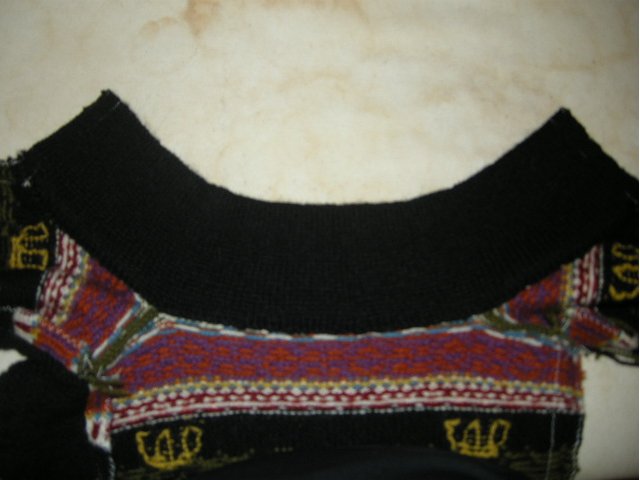
Here is the finished arc-shaped collar, complete with hidden neck curve edges. It both fits a human neck and stands up, thanks to the combined powers of gauge and malleability.
In case you are wondering, no, it wasn't strictly necessary to make the collar at this stage of construction. I could have waited until the very end just as well. However, I decided that I would rather work the collar before the sweater had the added weight of sleeves. Since part of the process requires swinging the whole garment around in little circles on size 1 needles, I elected to perform that feat before the sleeves were added. YMMV.
Join me for the next installment, in which sleeves grow sideways, cats and dogs live together, and things get a little bit weird. er.