
Nuts and Bolts
Warning: This blog post contains graphic photos of sweater in progress being cut with scissors. Readers who don’t want to know how the sausage is made should maybe sit this one out.
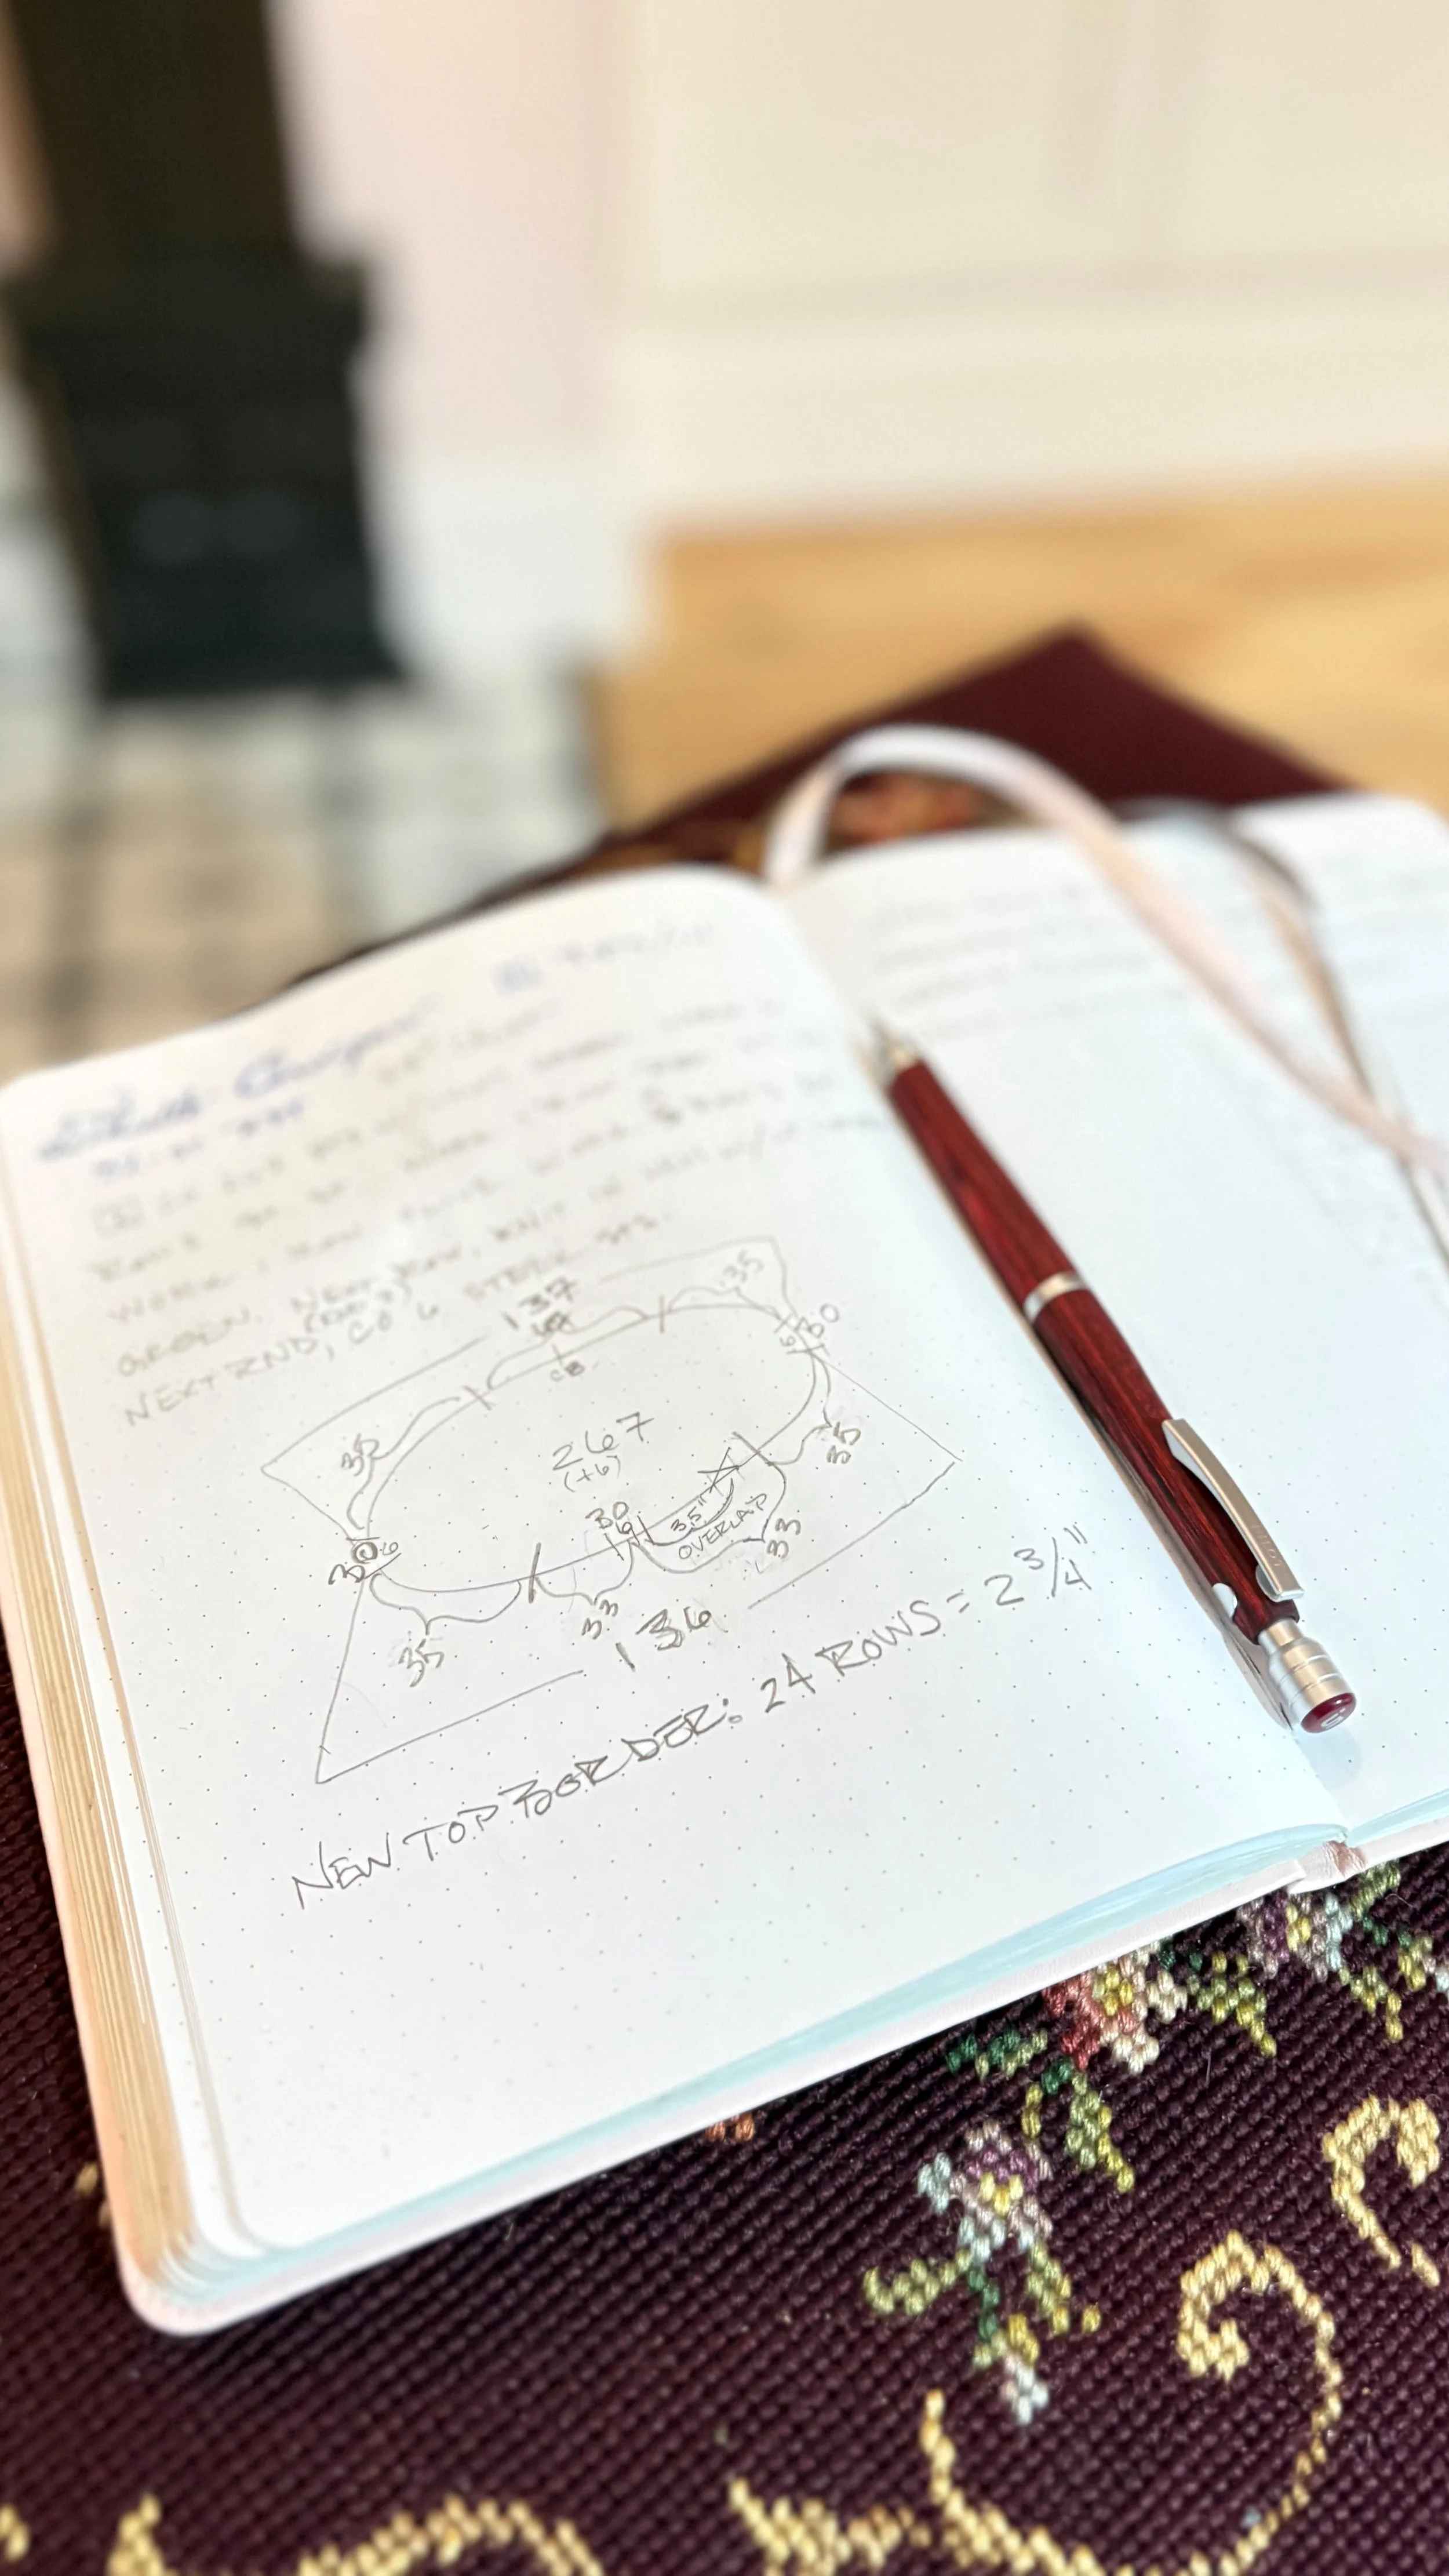
The rubber is starting to hit the road, here at Mary Elizabeth Scott Handknitter International Headquarters. As always, while I knit/design, I keep meticulous notes about what I’m doing, how I’m doing it, and what numbers are involved. Usually they are scary-looking, and unintelligeable to anyone but me. For example, the scribble below represents a cross-section of the sweater body tube, with the division of stitches called out for cutting. My loved ones refer to my notebook as evidence of a “beautiful mind”.
The running commentary
Project Milestone: The sweater body tube is complete! Time to secure the center front and neckline steeks. This time I’m securing the steek with machine stitching. I’ve chosen this technique because it works best for the particular edge treatment I’ve imagined for the center front and neckline edges. It also allows me to simply cut off the 8 trillion yarn tails created during color changes in the knitting. That’s right: I WILL NOT BE WEAVING ANY TAILS. Let that sink in for a minute. I just CUT THEM ALL OFF:
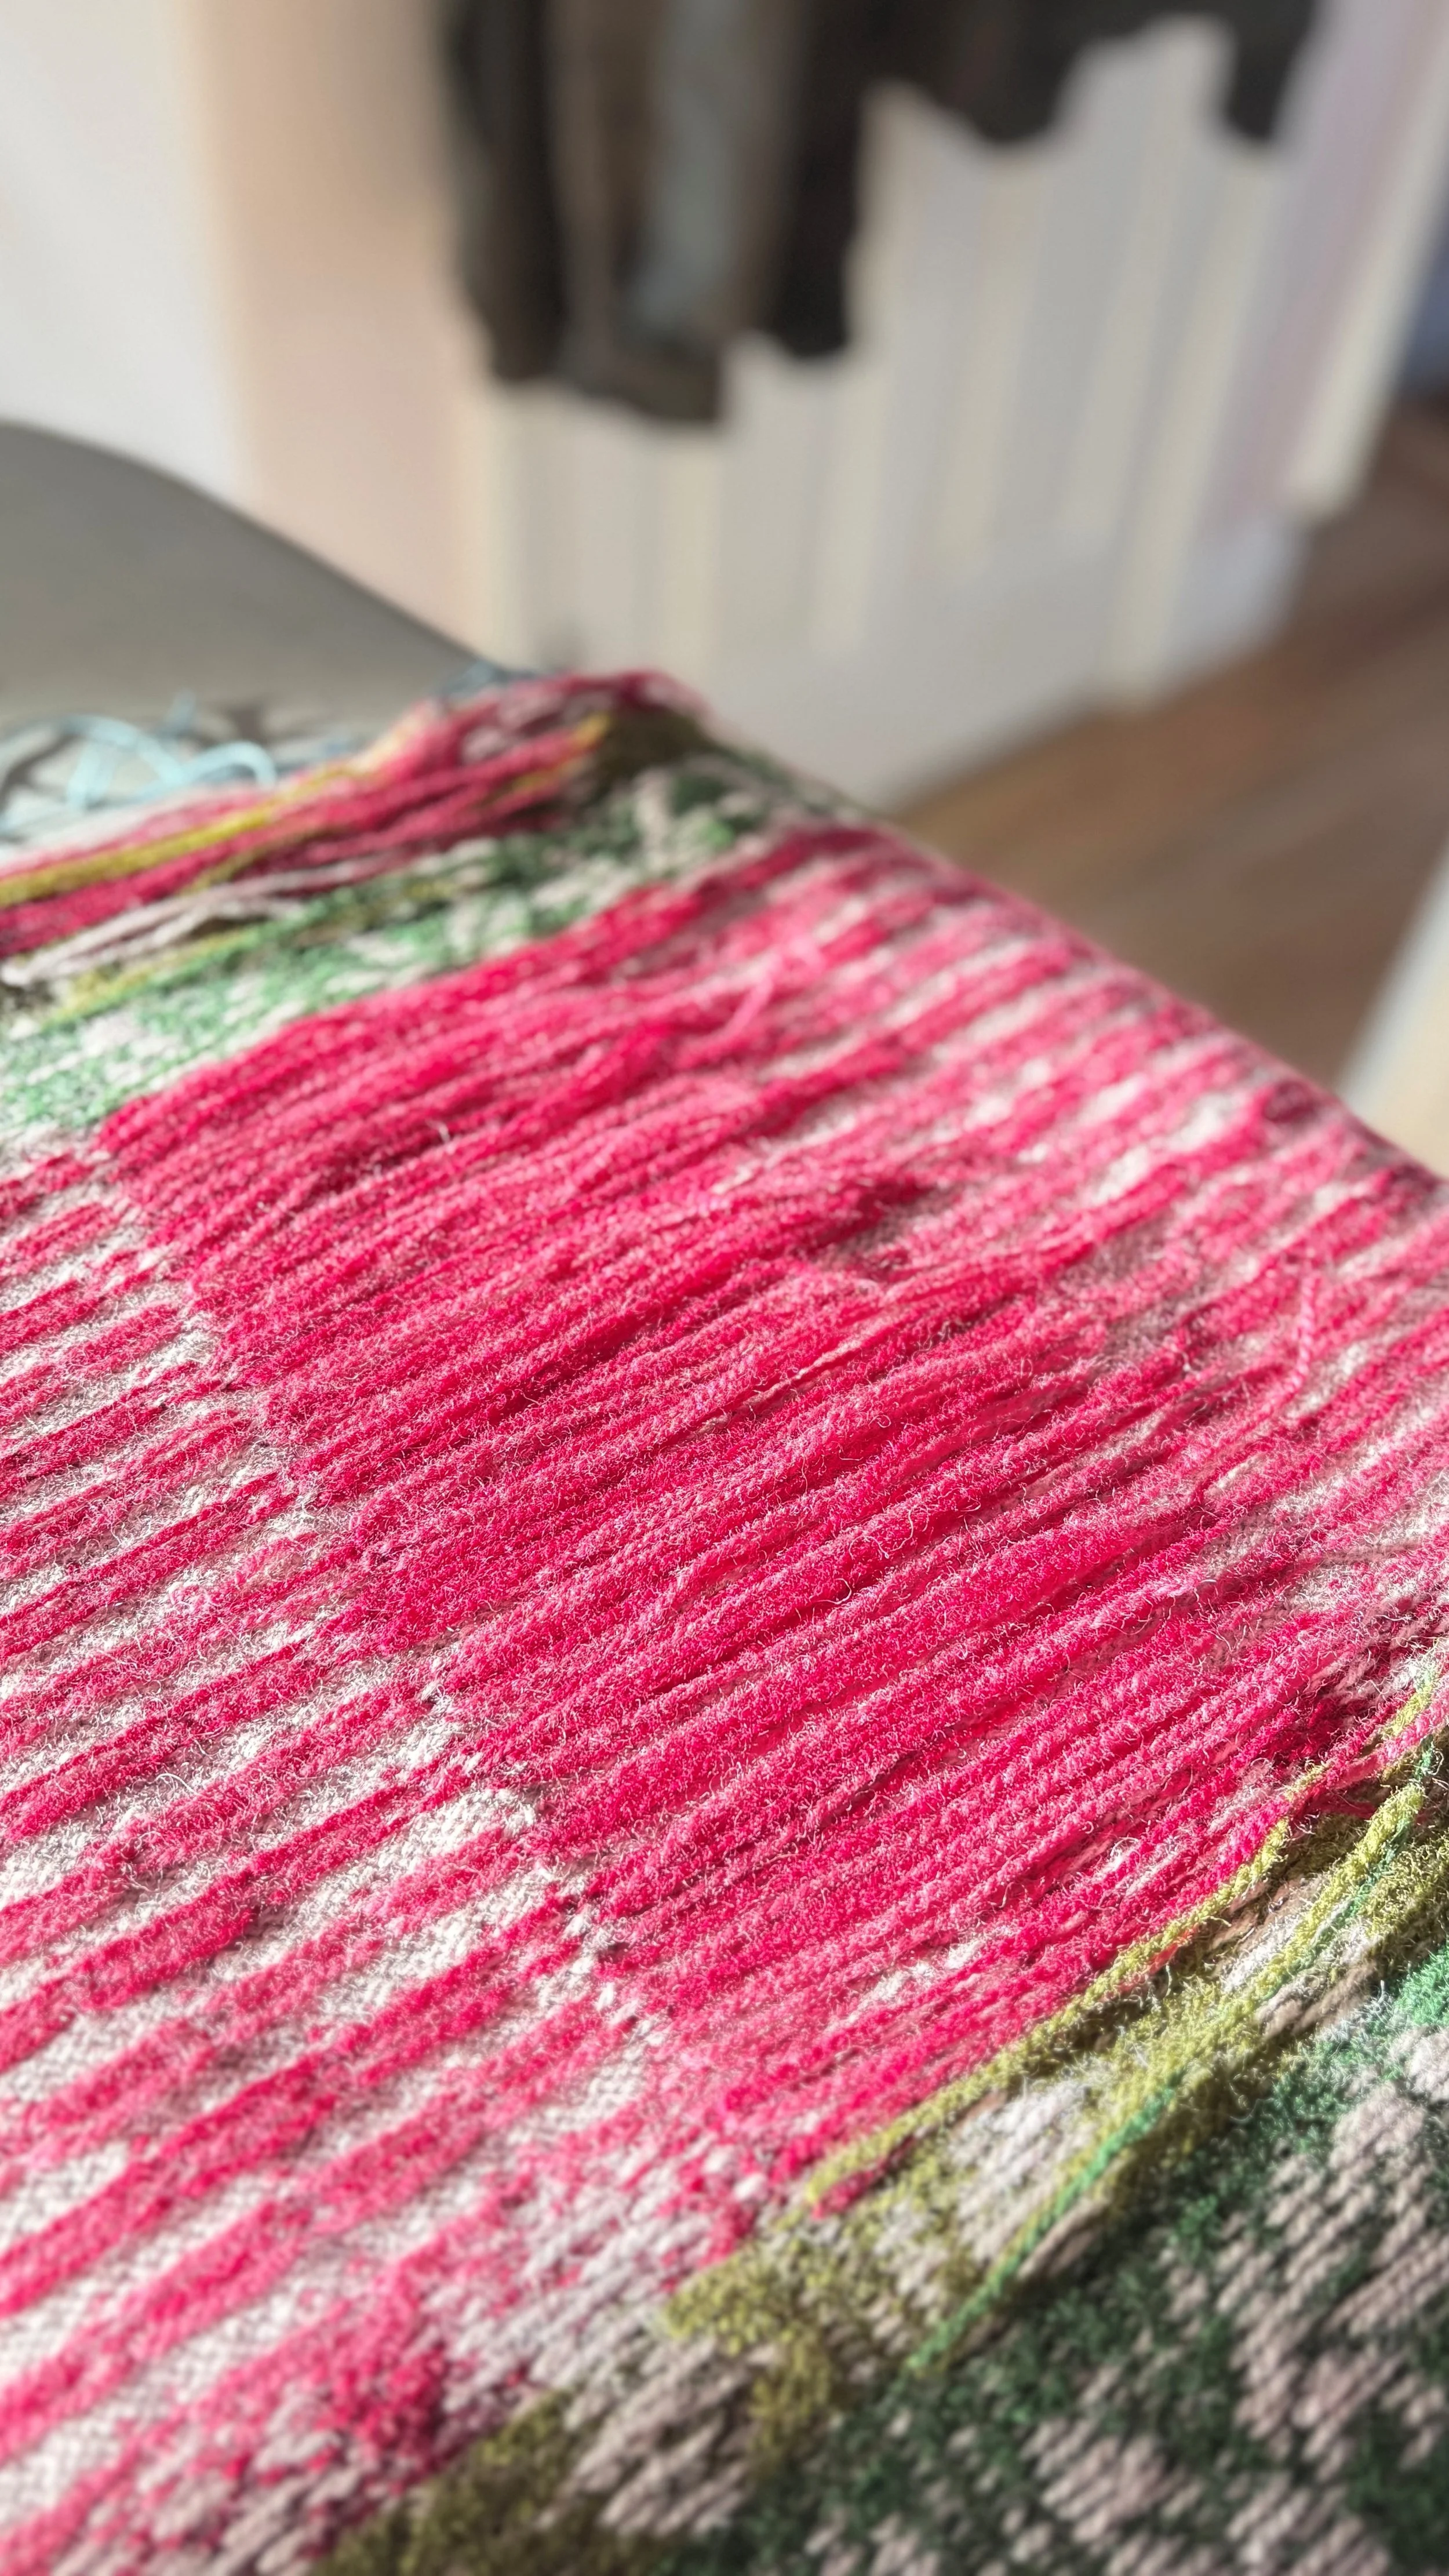
Yarn tails in Combover formation
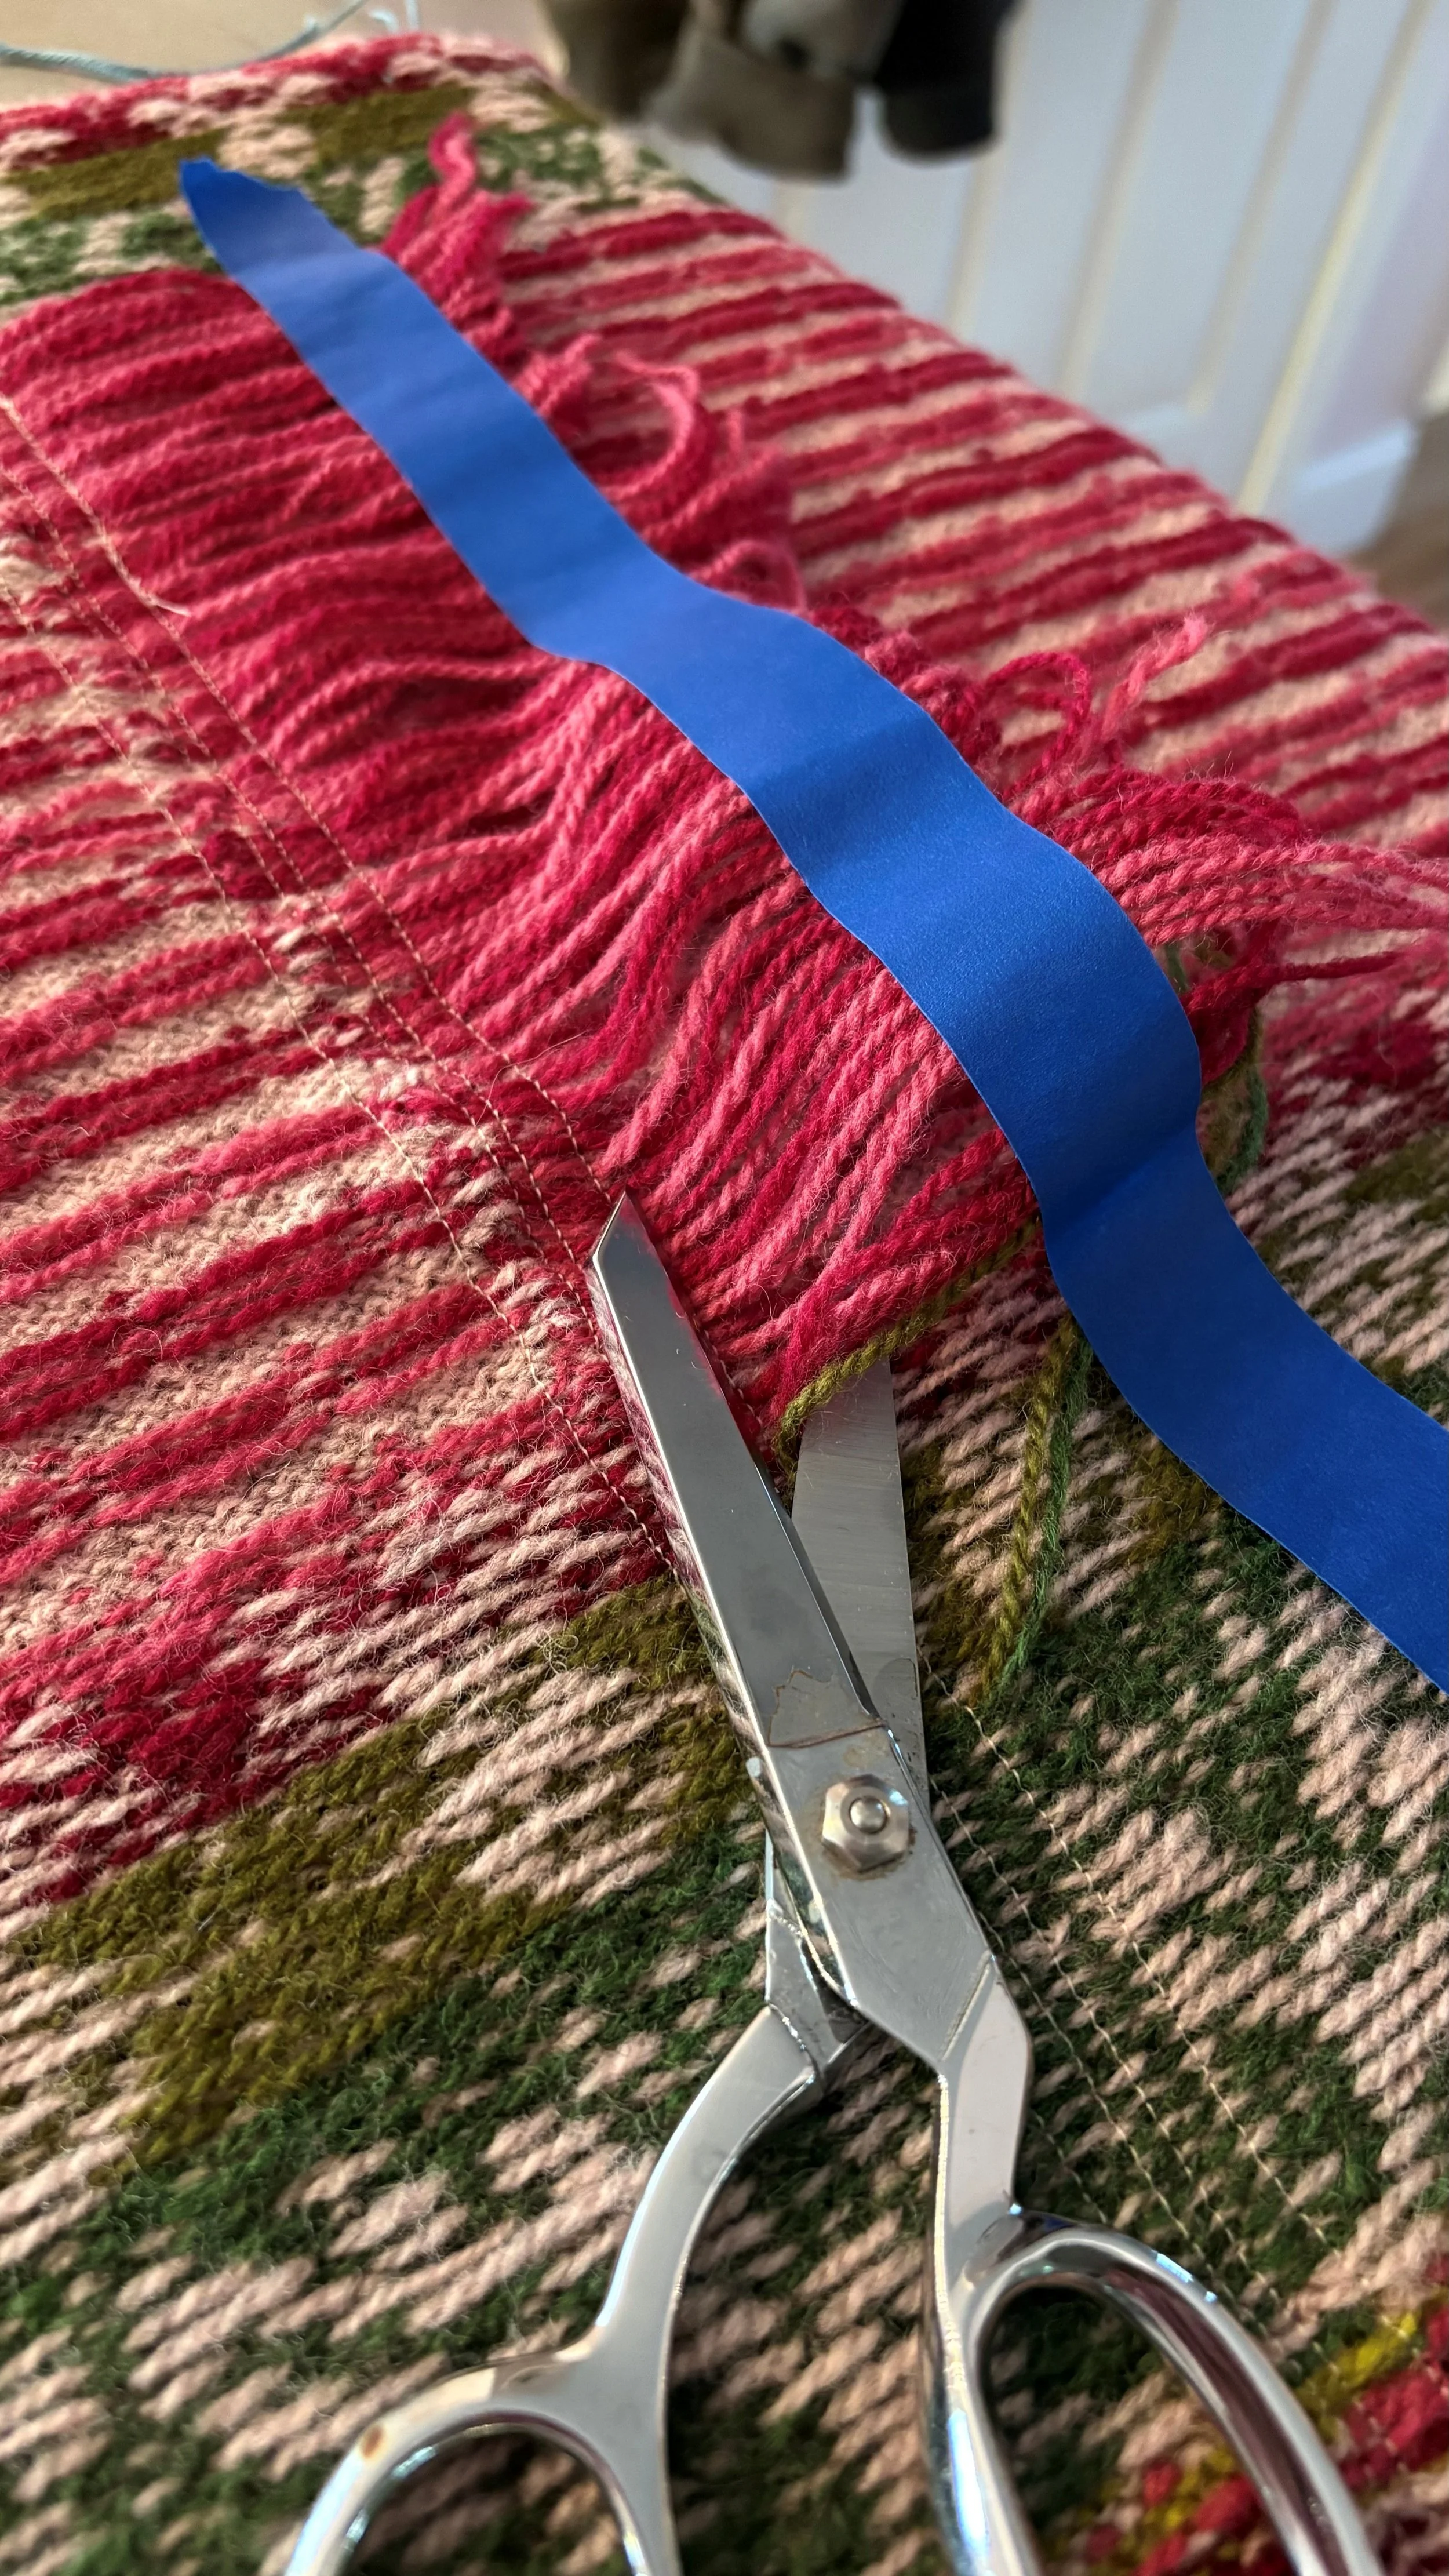
Yarn tails machine-secured along with steek stitches (tails controlled with painters tape)
Lift the tape to hold all the tails up for removal
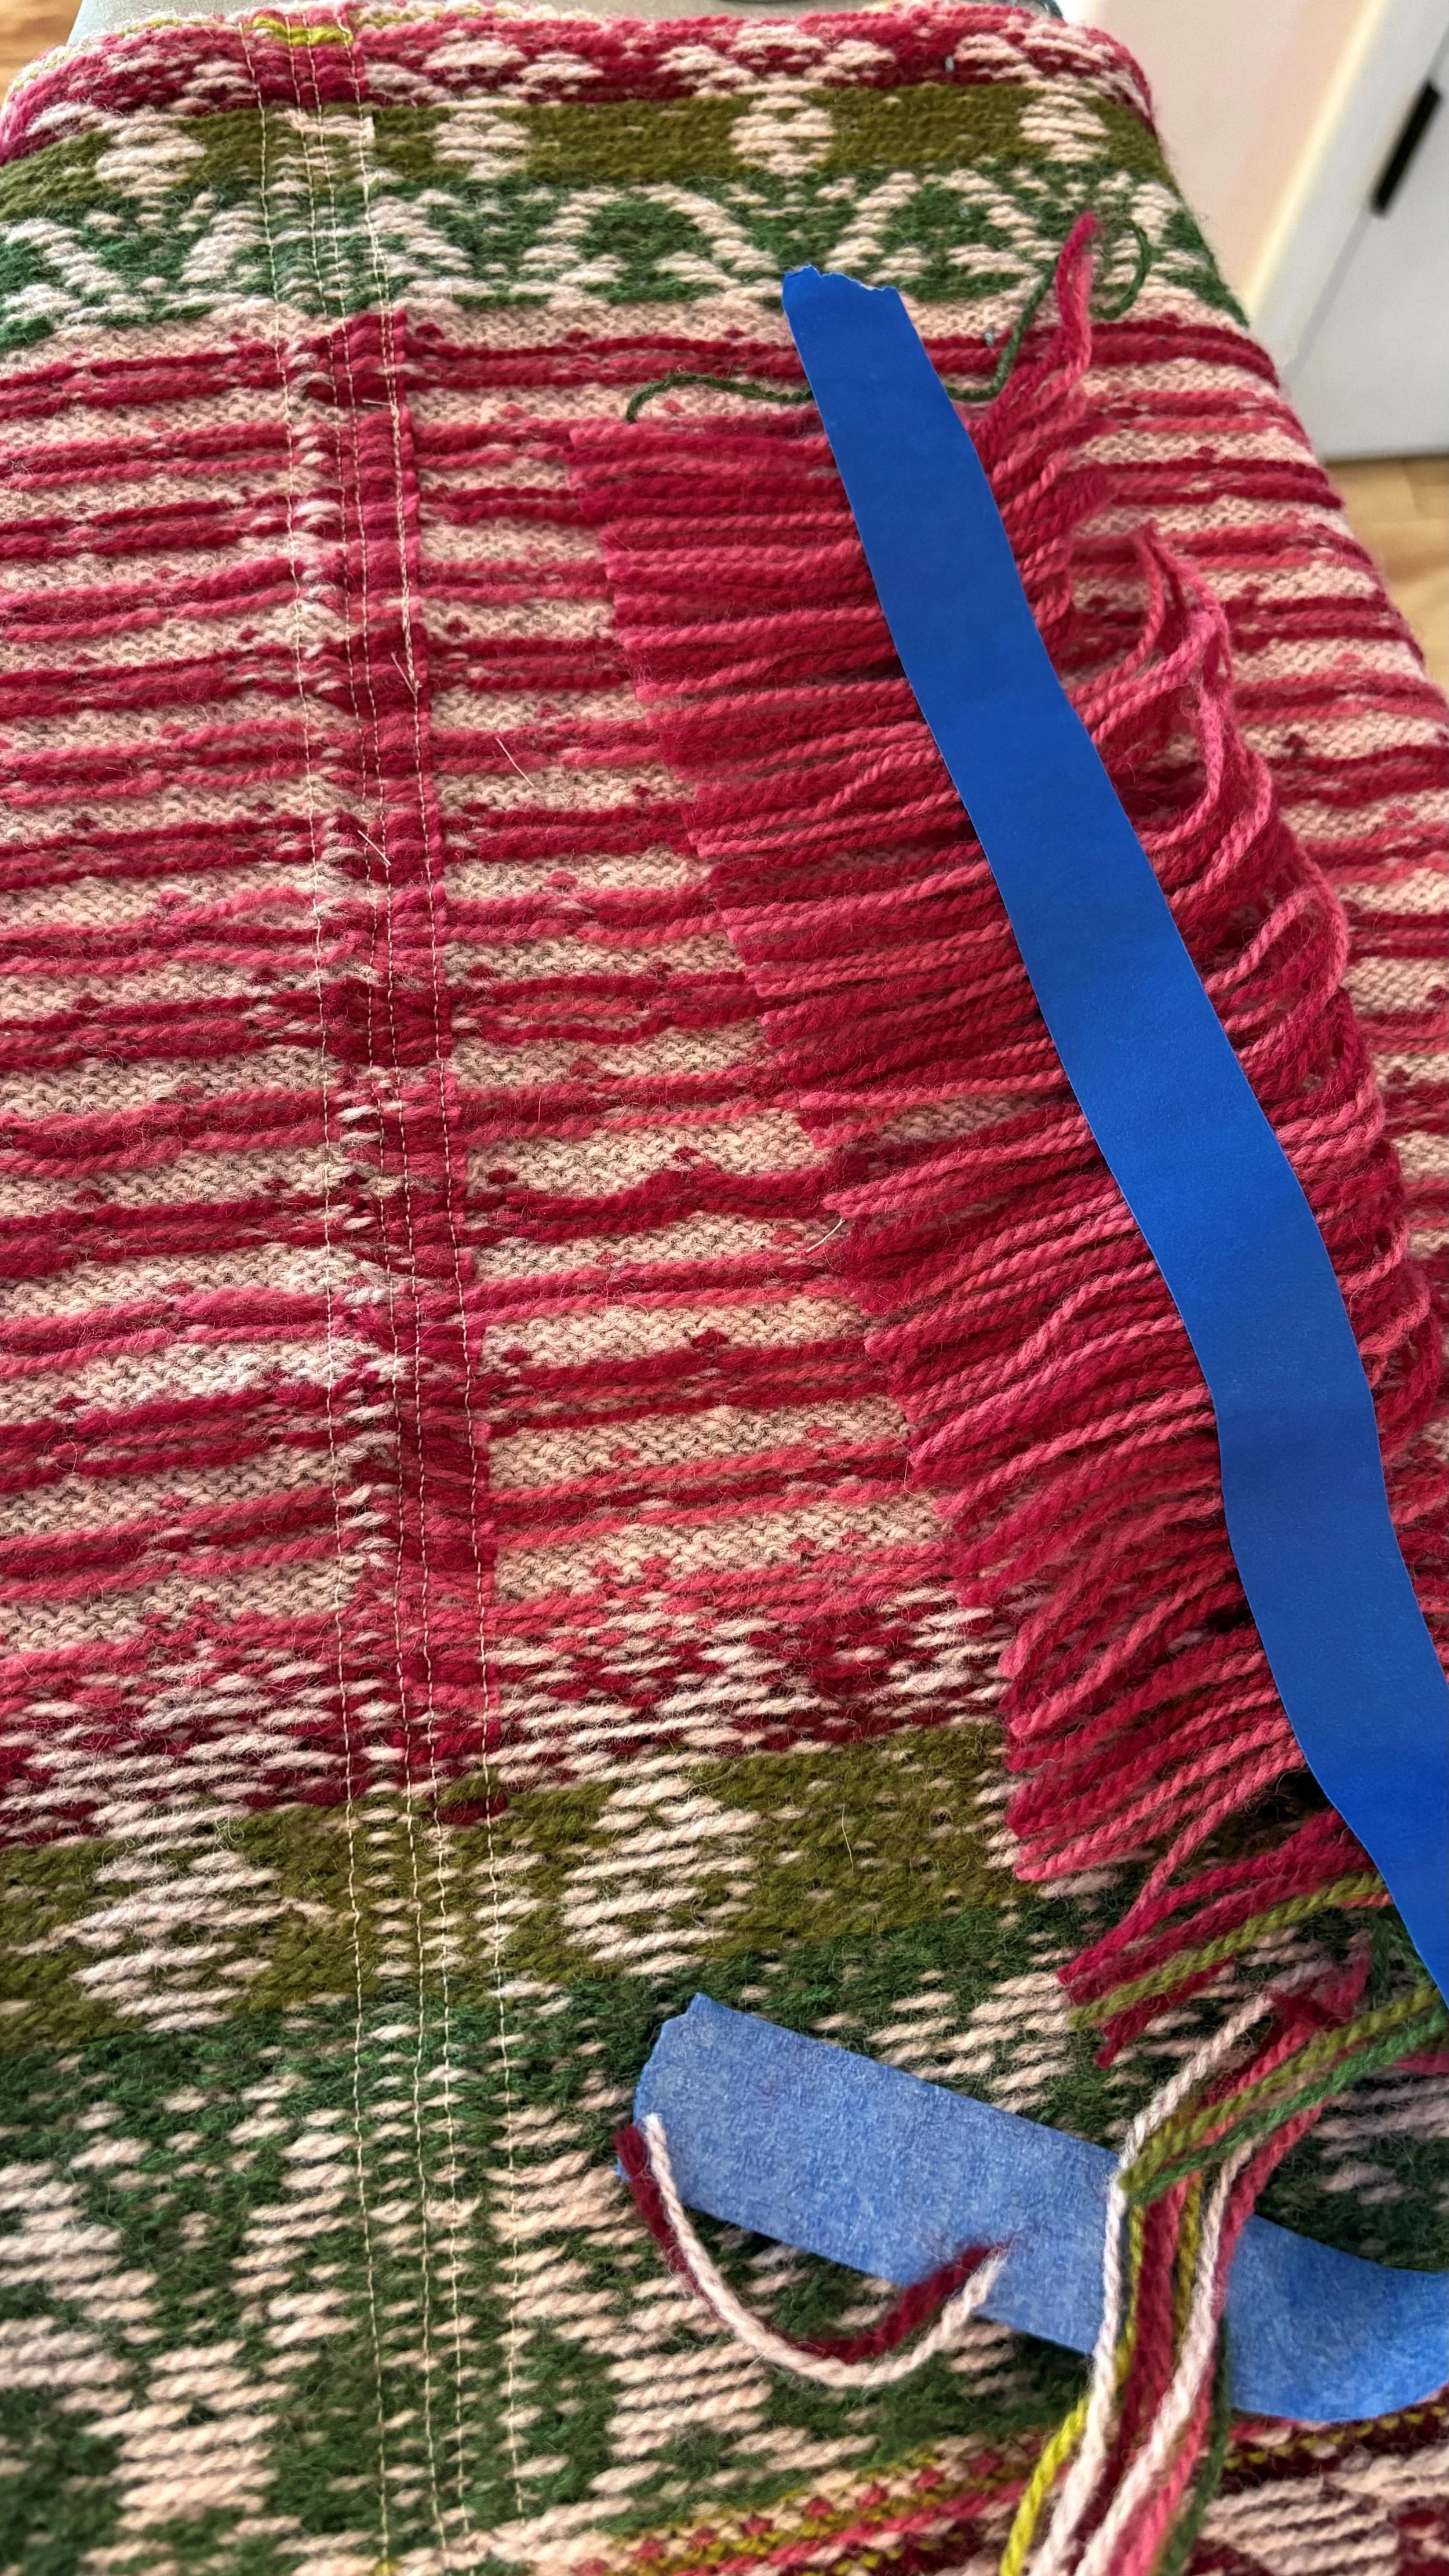
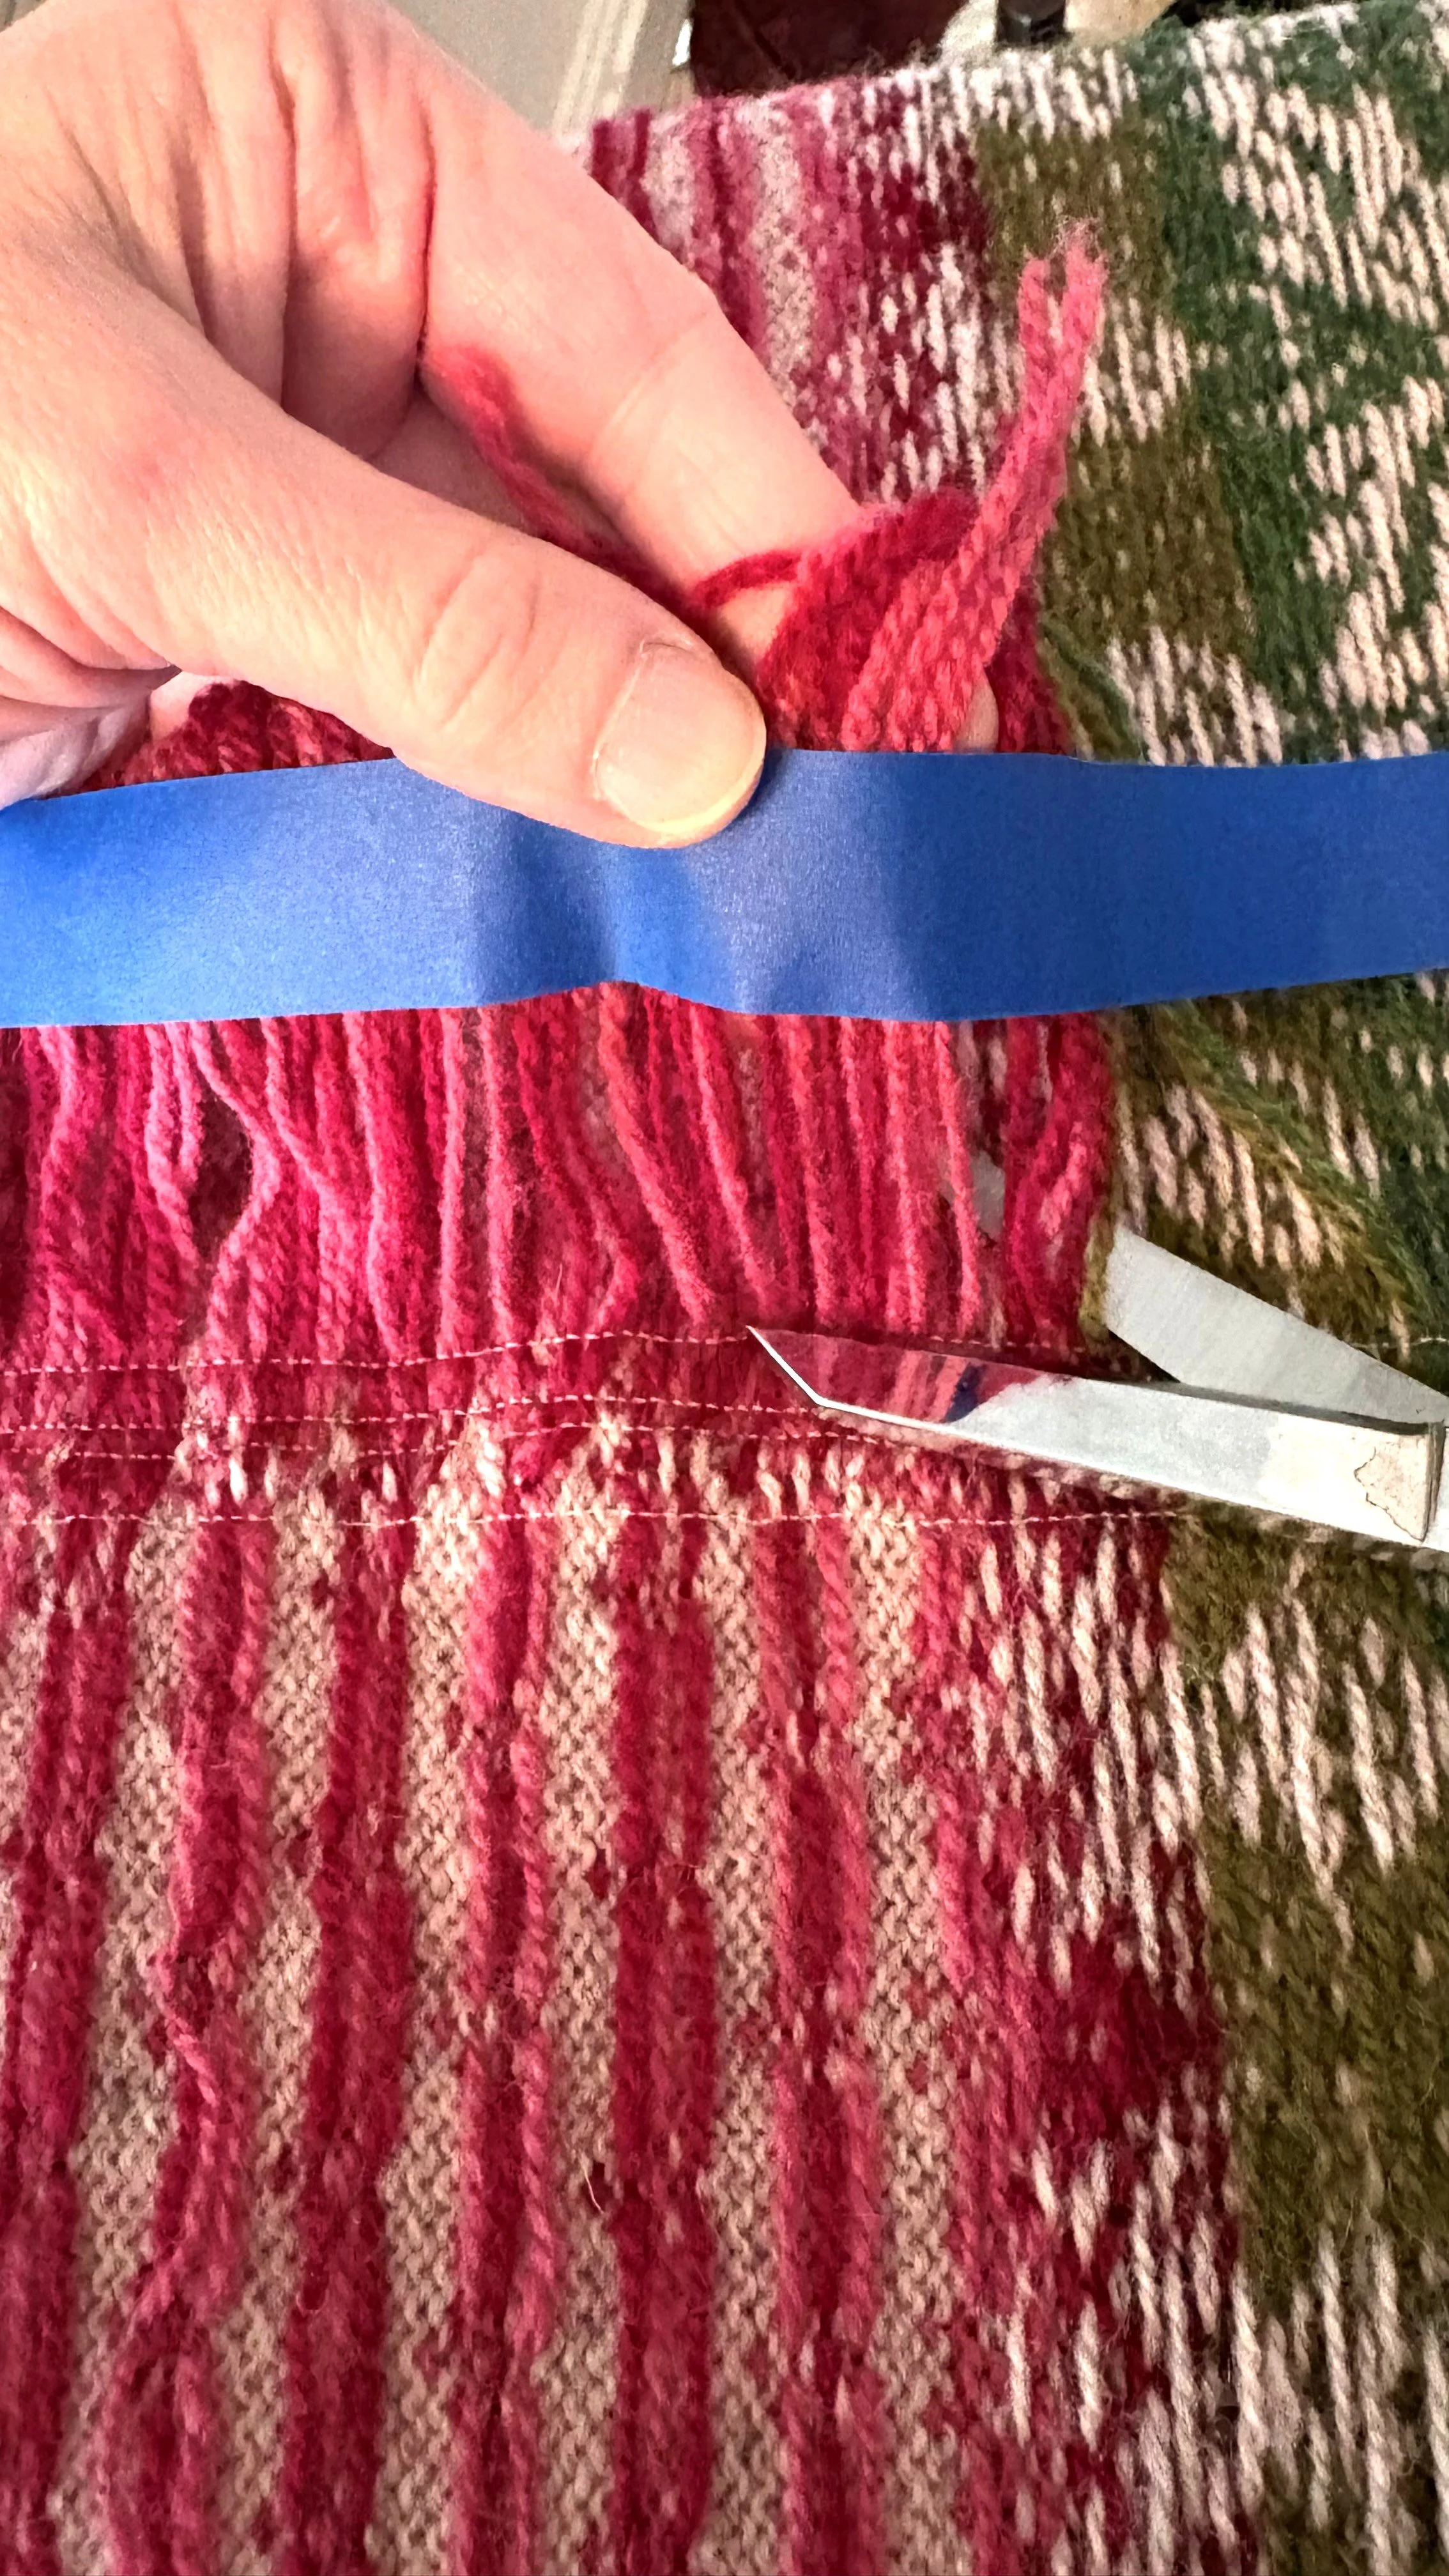
Cut off all the tails close to the machine stitching
It’s okay; I’ll wait while your loved ones retrieve the smelling salts to revive you.
Next it’s time to plan the actual cutting. The center front steek is already secured in this photo, though the machine stitches are not visible from the front of the work. At the top of the body tube, you can see that all the knit stitches are still live. They’re divided into sections for shoulder seams, armhole slot locations and neckline areas, and held by waste yarn.
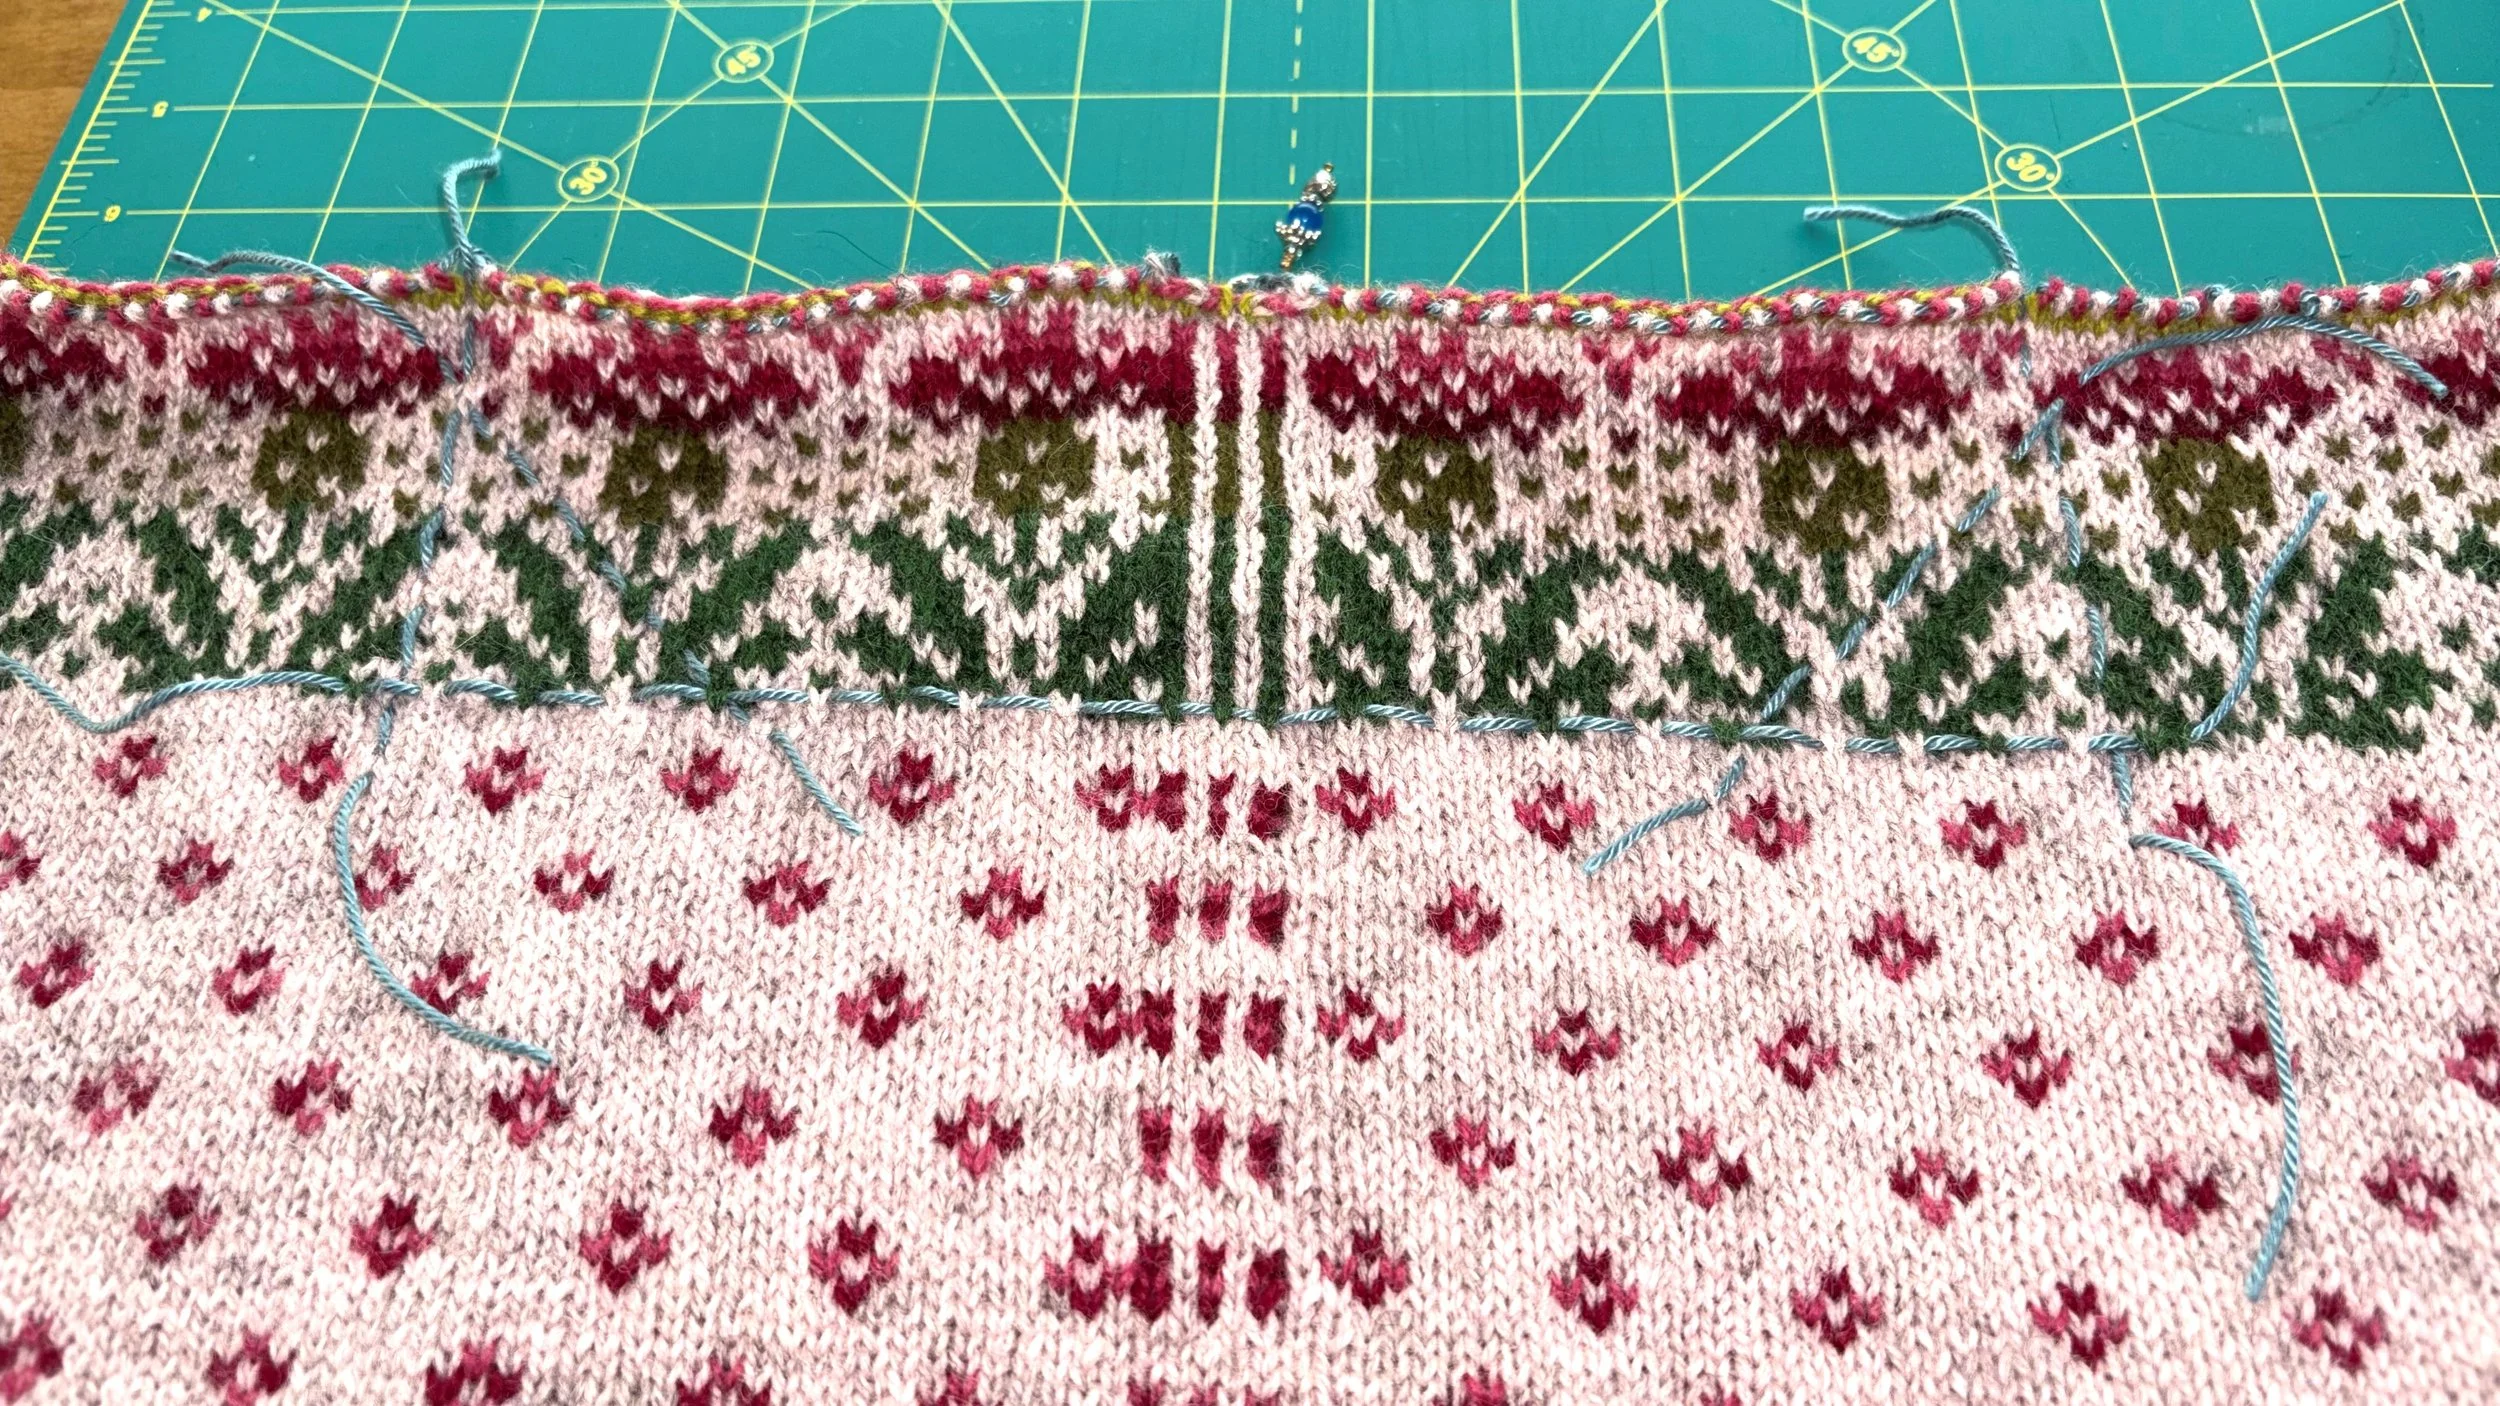
Blue cotton waste yarn markers in place for precision placement of front neckline curve
Surprise! I’ve created a smaller-scale version of the thistle border for the upper edge of the cardigan. Combined with the sexy edge treatments I have planned, it will draw attention up to your beautiful face. Because the wearer is the most important element of all my designs.
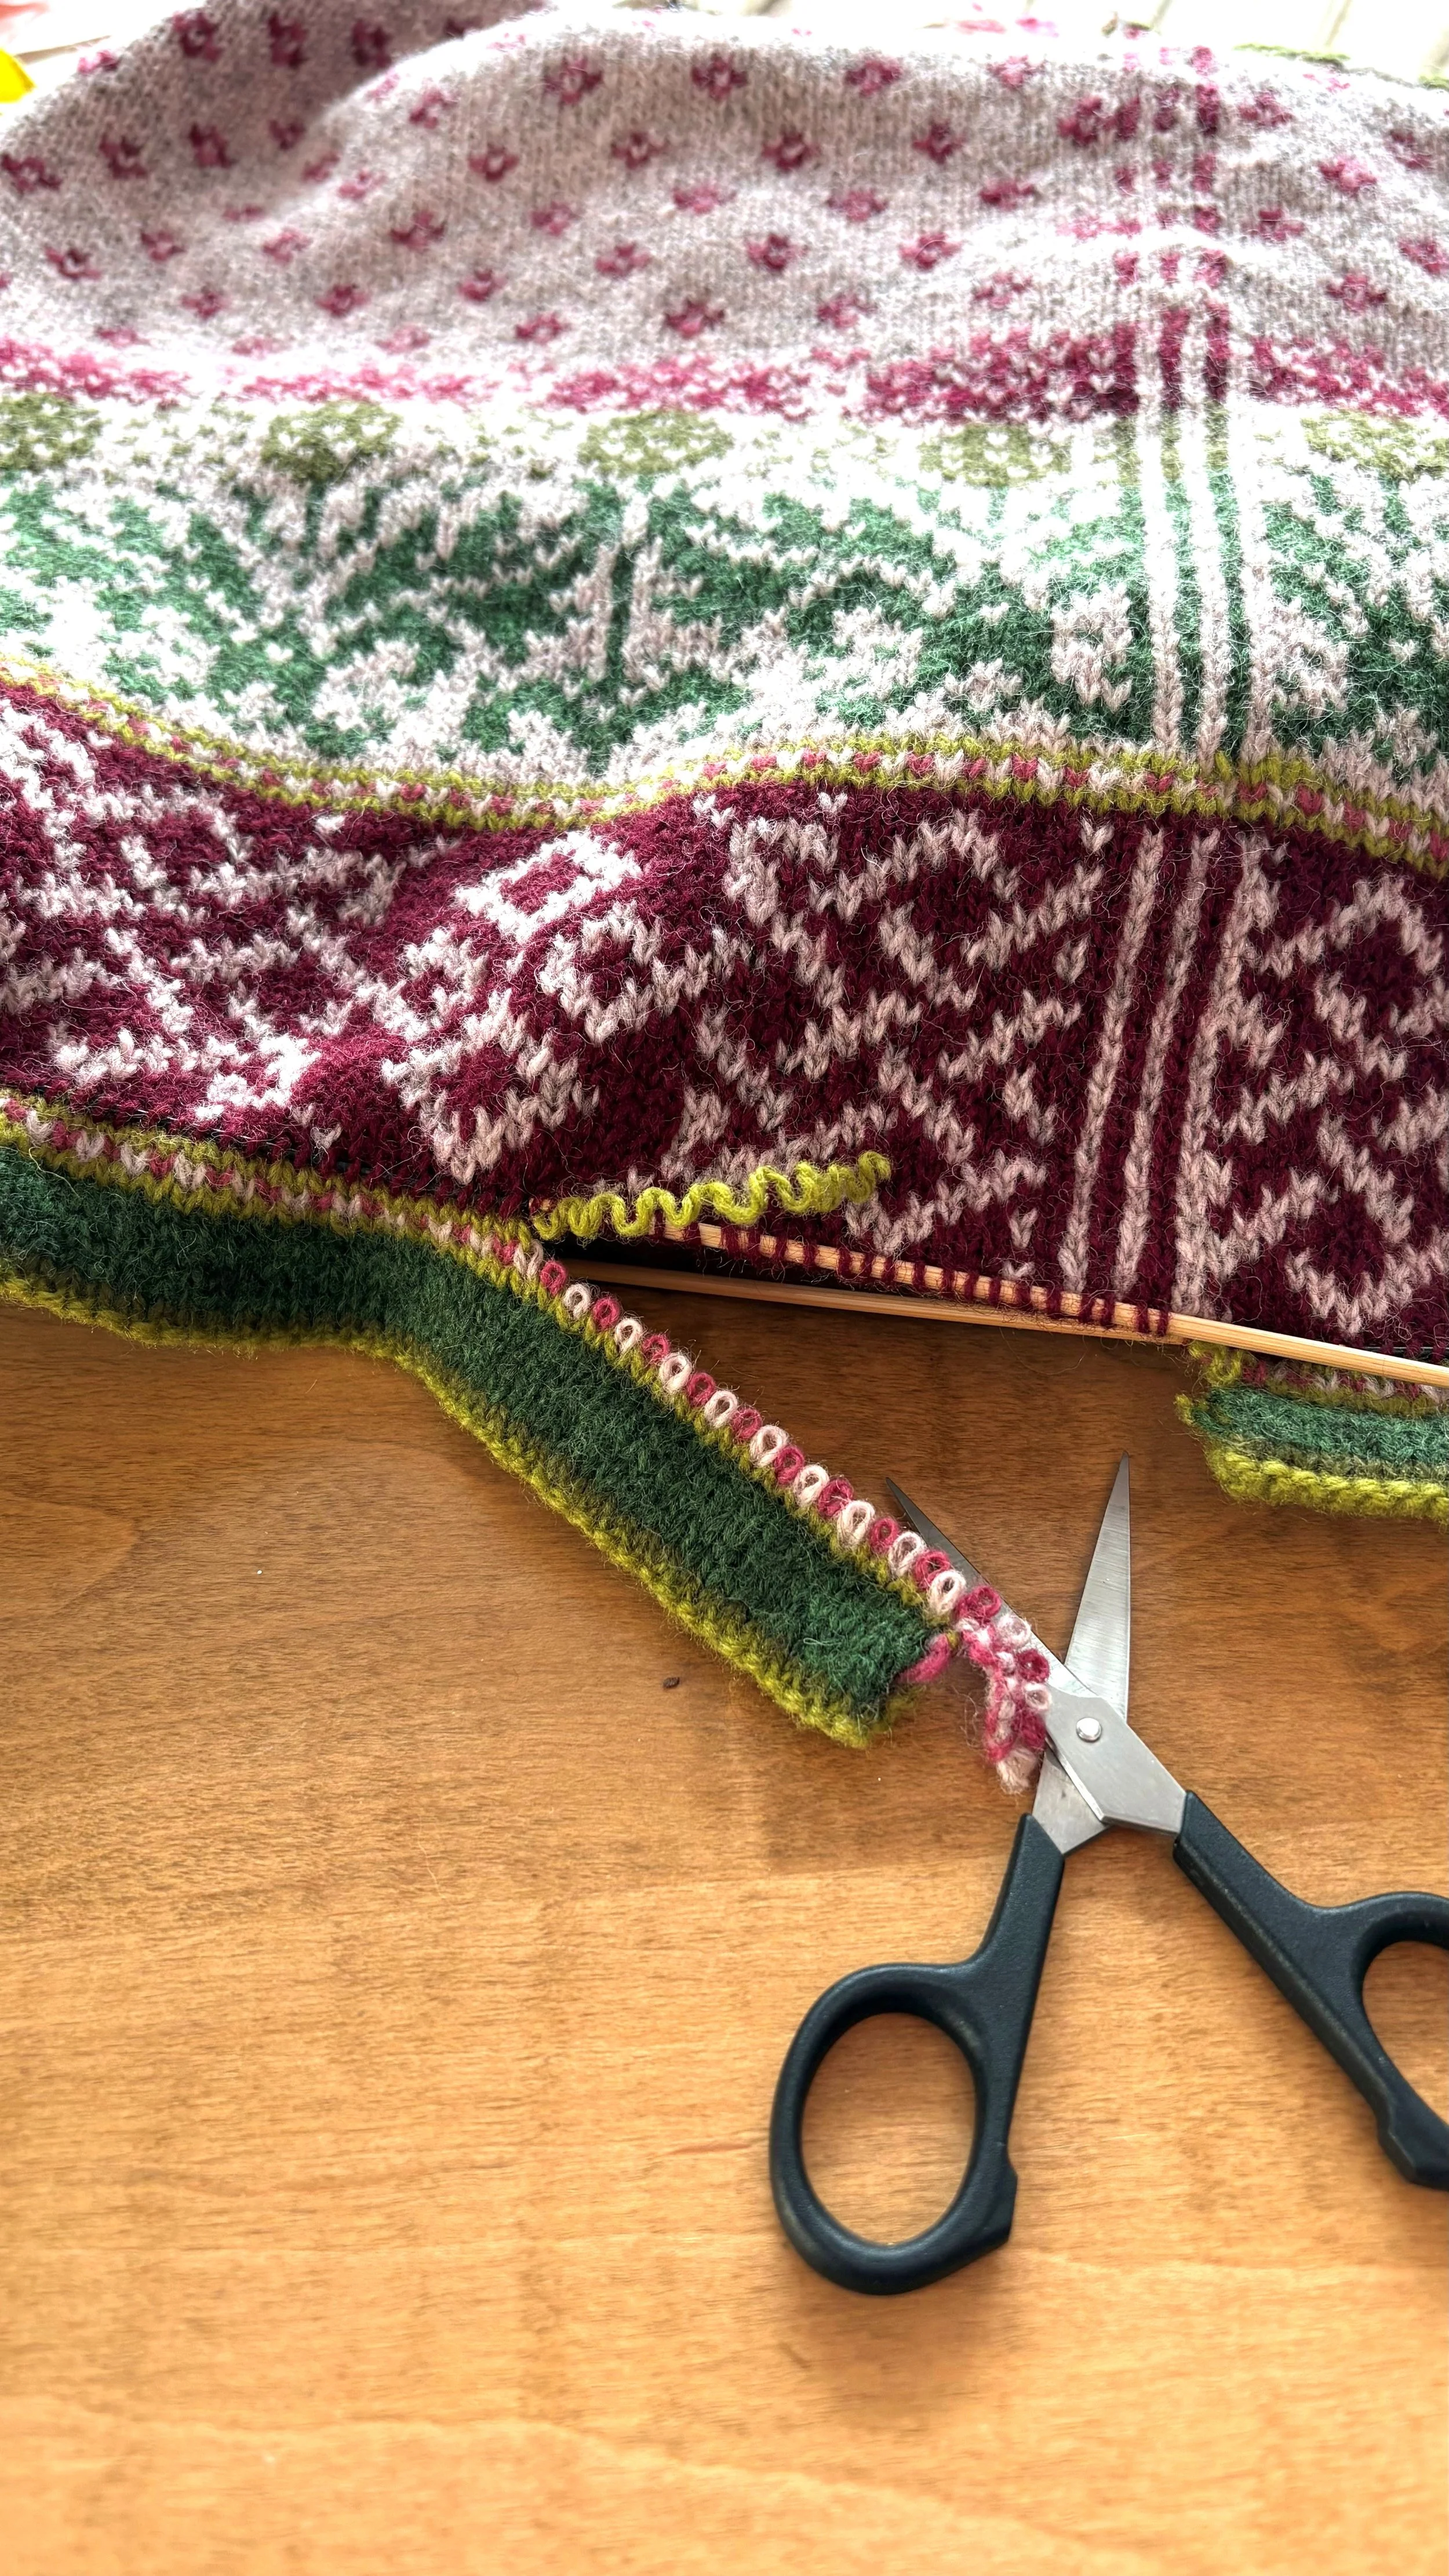
Tactical error requires surgical removal of the hem. Oops.
Mistakes are part of my process. Although the lower edge treatment was as beautiful as can be, I worked it too early. A more elegant order of operations is required, so away it goes (for now). I just snip out one round of knitting, placing the resulting live stitches on a slender needle as I go. Afterward, I’ll crochet a temporary waste yarn bindoff to hold them safe until I’m ready to work the final lower edge.
The most wonderful thing about knitting is that it never goes on your permanent record. There is almost nothing you can knit that can’t be turned back into yarn.
I hope you’ve enjoyed this brief glimpse into the process of translating my crazy into a coherent and knittable design. Next stop: Working a straight edge in a circle. Because why not?
I promise I am mad but North-Northwest.