Noodling on a Thistle

Swatching the Pink Thistle and making notes with my new favorite mechanical pencil. Get one of these beauties for yourself HERE.

As promised, the start-itis is real over here, and I’ve been dilligently swatching while thinking about how best to address the new design I’ve promised you. The news is great - I love the pink colorway as much as the original purple, which I never thought possible. I also love this yarn more than is probably reasonable. I’ll tell you all about it in detail going forward, but first thing’s first: Many sincere thanks, Gentle Readers, for your votes on the sillhouette of the Thistle sweater to come!

Wouldn’t you know it: The comments are evenly split between Yokes and Drop-Shoulders. Therefore, I’ve made a considered decision as your tiebreaker in chief. Here’s a look inside my thought process:

How to give a thistle a wedgie

The OG Thistle chart was created for a rectangular shawl, free of any garment shaping. For that I designed the thistle “picture” on a flat canvas. To alter the chart for circular yoke shaping, I would have to remove wedges of knitting via decreases from that picture. The illustration above shows roughly how that might go.

You knew there would be scissors, right?

Here’s an old-school way of playing with shaping in the chart - actual cut and paste. This mockup shows a version of what happens when I remove wedges of knitting from my rectangle to create a circular yoke: In a word: Crowding. They still look like thistles, kinda, but only to those of us who have seen the original. The leaves, while still leafy, are no longer Thistly. And the blossoms don’t retain their fluffy topknots. While not altogether awful, I don’t think this is good enough for MY knitters.

Could I design a completely different thistle that fits properly into a circular yoke? Probably. But I’d be losing the charm of the original chart, which 10k knitters around the world have voted for with their purchases. My instinct is that the original Thistle chart isn’t broken, so I shouldn’t tinker with it.

Lazlo sent the Scotties to Time Out so he could properly supervise the Thistle Cardigan cast-on. (The bright green you see here is the hem facing that is only visible on the inside).

One of the other considerations that you have helpfully mentioned is the direction of knitting. For those who asked for a top-down construction, I’m afraid I’ll have to disappoint you. There are two reasons for this:

1. I have strong opinions (surprise) about the orientation of each stitch in the motif chart. I cannot abide an upside-down stitch (“^” vs “v” shaped) unless the chart is intentionally drawn for it. The thistle motifs are drawn in upright orientation. Reversing the direction of construction will call for the reversal of every stitch’s orientation. While many would not be bothered by that at all, it would cause MY teeth to hurt.

2. While undeniably fun to knit, top-down construction for a circular yoke requires shaping via stitch increases, while bottom-up shaping is achieved with stitch decreases. My prejudice is that in most cases, decreased yokes look prettier in the knitting and fit better on the body. The fitting can be engineered in reverse to accommodate this issue, sort of. But not inside the limited acreage of a motif chart that is already suffering from dreadful crowding. So yeah: This sweater needs to be worked from the bottom up.

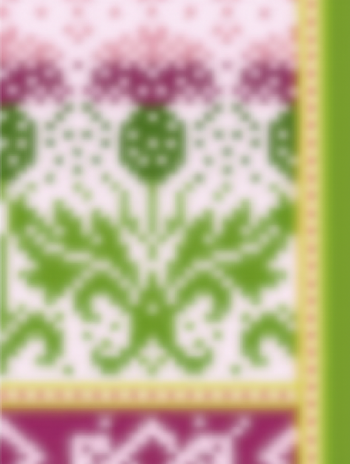
The lower edge of my new pink thistle is happening! I forgot how muuch I love this Celtic Knot border.

To sum up, with your help and input, I’ve decided that Thistle 2.0 will be a cardigan, it will be worked in the round with steeks, from the bottom up, and it will have a drop-shoulder sillhouette.

One final word on the overall design: I’ve envisioned a really unusual and flattering finish for it that I think will knock all of our (handknit) socks off. Stay tuned!

Now with More Thistling

Well, it’s happened again: The Knitters called, and I picked up!

It’s been a fairly brutal year in the making-ends-meet department, (and I know I’m not alone). So much so that I’ve barely had the heart to knit. I know: hard to believe, and pretty brutal, indeed.

But as always, my Knitters have pulled me down off the ledge. In the wee hours of this morning, a whole lot of you downloaded copies ot the Thistle Stole, for which I thank you, from the bottom of my heart.

This flurry of Thistle-buying reminded me that I have not followed through on my threat to create a Thistle Sweater. A while back, I even selected the winner after auditioning three different yarn lines/pallettes - I just never got off the ground desigining it. So thank you also, for this firm shove back into my Native Habitat/Happy Place. I Hereby Proclaim, it is time to visit an old friend! I give you:

A pink thistle this time! I’m going to start swatching right away, before the start-itis can dissipate. While I’m doing that, I need your help, Gentle Readers.

Your mission, should you choose to accept it, is to vote on the following:

Would you prefer a cardigan silhouette in A) a circular yoke, or B) a drop-shoulder? Leave a comment with your vote, along with any other ideas/requests you have for the new design. Many thanks in advance for your input! Watch this space for the process…

Auditions and callbacks

I’ve been doing a fair bit of mental noodling about Campbell’s Aran sweater, now that the yarn is ready. As always, there are some considerations that will inform my design choices. Conferring with my client, we arrived at the following for the basic silhouette:

Garment Silhouette

As you can see, it’s pretty traditional, with Campbell’s favorite elements included to personalize it. Specifically, he requested shoulder saddles and a shawl collar. It wasn’t till I sat down to sketch it that I realized: I don’t think I’ve ever seen shoulder saddles and a shawl collar on the same sweater. There’s no reason not to do it - I just think it’s a bit uncommon. So is Campbell, though, so there you have it.

Design Elements

Of course, if there are shoulder saddles, I insist that they continue all the way down the sleeves and into the cuffs. Because if it’s not sexy, why bother? Also sexy is when the body cables extend down into the lower edge treatment, through careful planning. Add that one to my list of requirements. There may or may not be a closure of some sort where the collar overlaps. We shall see, but you know me: If there’s a place to put a button, buckle or tie, I’ll find it.

Cable Styles

Cam also had some opinions about the styles of cables he likes: Honeycombs and twists more than geometrics and braids. And finally, we agreed that I could add some special motifs that would be secret messages to him from his mom, but that they would be somewhat hidden, in panels at the sides. More to come on the secret message motifs!

Construction (knitter’s safety)

Before losing my heart to any particular cable(s), I wanted to sort out some construction details. I *MAY* have mentioned that this will be a big sweater. And by “big” I mean “as seen from space”. The amount of fabric in it will require some structural support. For that, I’ll be relying on seams.

At first the idea of seams made me sad, as I prefer to work circularly whenever I can. But on reflection, I realized that swinging a 56-inch sweater around in circles is actually much more work, physically, than working the pieces one at a time. Aside from eliminating seam-sewing, the main advantage to knitting in the round is that you don’t have to work wrong-side (purl) rows. But while that’s true for stockinette knitting, cable knitting has just as many purl stitches on the front as the back side of the work. Knitting separate pieces will also work well for bottom-up construction. I’m choosing that this time so I won’t have to reverse-chart any cables, which can be an adventure/aneurysm.

Another thing I’m thinking about is the cable(s) I’ll choose for those shoulder straps. Yes, they’re dreamy, but they also have to support the weight of the entire sweater. I’m leaning toward something dense, without too many rows between crosses. Otherwise they might stretch laterally, allowing the whole garment to drag out of shape.

In addition the construction, I’m considering scale. I started shopping for cables in my stitch dictionaries with an eye to the sizes, as well as the styles. I’ve got a lot of blank space to fill, without using too many different cables, and without having to repeat elements too frequently. While I will use varied widths, I want the effect to be proportionate to the garment as a whole.

Swatching

With all those ideas in place, I shopped just about every book about cables that I own. Once I found the contenders, I swatched. A. LOT. The paper tags in the photos below are to remind me where I found each chart, and of its stitch count, row count and measurements. Swatching each element and laying them out in order is the best way for me to predict how they will fit and measure together in the actual sweater. I’m sure there are knitters who can accomplish this using math, but I’m not one of them.

This one’s a clear winner for the center front panel. It needs borders on either side to keep it company though.

I remembered this little number from a different book. Its row count is perfect, and there’s a lovely reverse of it for the other side (didn’t bother swatching the reverse). And then I added a wee 4-st twist to border the works and divide it from the next panel:

Which will be Cam’s requested Honeycomb. It took a few tries to get a width I like but I love it juxtaposed with the rope-y center twist. Bonus: it’s un-thinky to knit, and the row count also works well with its neighbors.

And now for the important stabilizing shoulder saddles. I like this firm plait for the job. I can also easily widen it if need be.

Here’s a combo I made up to border the shoulder saddle. I don’t love it yet and still need to try again. Adjacent to that is the filler stitch I’ll be using throughout: Mini Honeycomb. It’s fun to knit (no cable needle required!) and the fabric is both fluffy and flexible. I’m a fan.

This is the swatch collection (only those making the first cut - there are MANY others I deemed not groovy) so far. On the left are some contenders for the “secret message” side panels…To be continued.

So that’s the state of Campbell’s Aran at the moment. How do you like to plan your cables, Gentle Readers? Please share your process in the comments!